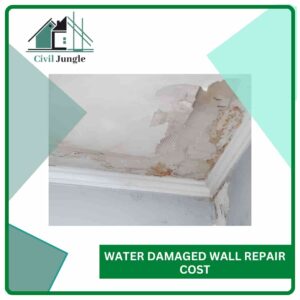
Introduction of Water Damaged Wall
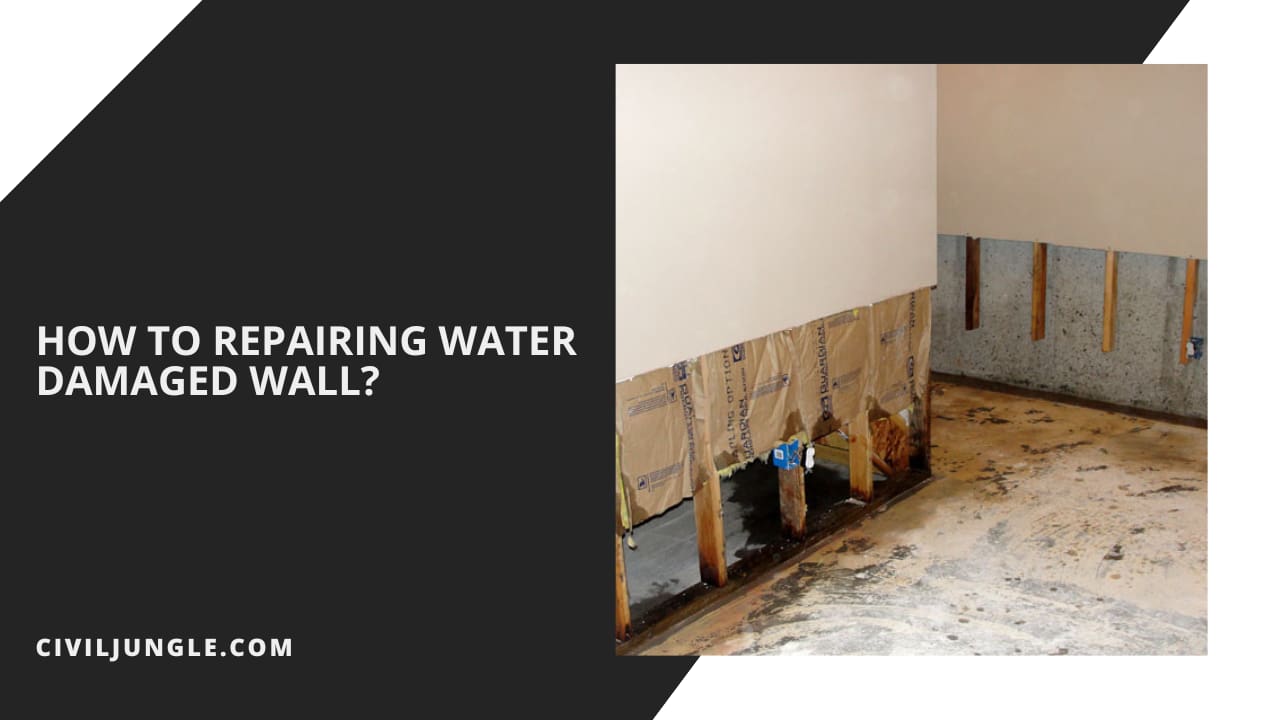
Sometimes, water damage wall issues can be highly destructive to the building materials. At the meeting time of the drywall, it enters the inner portion of the wall and creates worse damage; sometimes, it can also damage the wallboard of the wall, and as a result, it t collapses and falls.
This type of problem is very problematic to the house owner. At this time, don’t be panic; you just need to contact a contractor to find out the right contractor and detect the particular place of damage with some tools and techniques.
How to Repairing Water Damaged Wall?
There are some steps required for water damage wall repair.
1. Find the Water Leak

At first, when dealing with wall water damage, you need to detect the water leak from the wall, and it may be situated behind your wall. The walls always show some visible effects like a sign of moisture in the wall, falling structure integrity sign, etc. Water-damaged signs are visible in coffee-color strains sometimes.
Detection of the leak is essential because, at the time of work, it will create huge problems. Sometimes you need to remove the whole wall to find out the internal source of water damage. At the time of working, always wear gloves, goggles, masks, etc.
2. Remove Water-Damaged Drywall
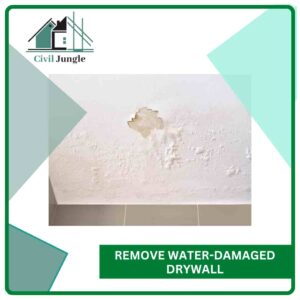
After identifying the water damage inside walls, we need to start the second step, like collecting dry-wall pieces, dust, and debris to clean out the damaged drywall.
After that, we need to remove the water-damaged portions from the wall by wreaking bar or the end claw of a hammer. Then we remove the wall panels; sometimes, we also use a keyhole saw to create a hole like a rectangular or square shape.
3. Repair Process
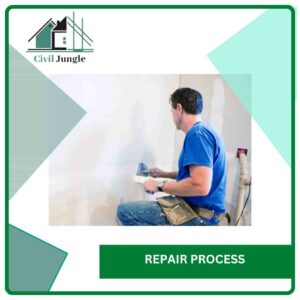
In this step, crucial for how to fix wall damage, you need to measure the rectangular or square areas, then we place another piece for replacement purposes. After that, we are laying replacement pieces by drilling holes on the four sides of that board. The holes are made by the drilling machine.
Then we apply a smooth coat of cement paste before fixing those boards. After completely drying the paste, we use sandpaper for the smooth finish of the surfaces and the edges of the wallboards. At last, use joint tape at the junction point of the wallboards.
4. Prime and Paint
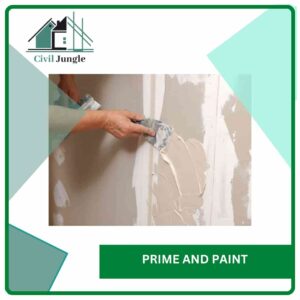
After completing all the previous works, we are going to enter this step. Here, as part of the how-to repair damaged wall process, we are applying this coating prime and paint. At first, we apply ultra-premium paint by applying a paintbrush or roller. These coats generally protect the wall from other water damages.
5. Water Damaged Wall Repair Cost
The damage wall repair cost varies from one place to another. This type of variation of price is happening due to availability of materials, availability of workers, transportation cost, etc. The average cost of water-damaged wall repair is about $1,000 to $5,000.
The national cost of water-damaged wall repair is $3,000. The medium cost of water-damaged wall repair is $150. The maximum cost of water-damaged wall repair is $20,000.
How to Fix Water Damaged Walls?
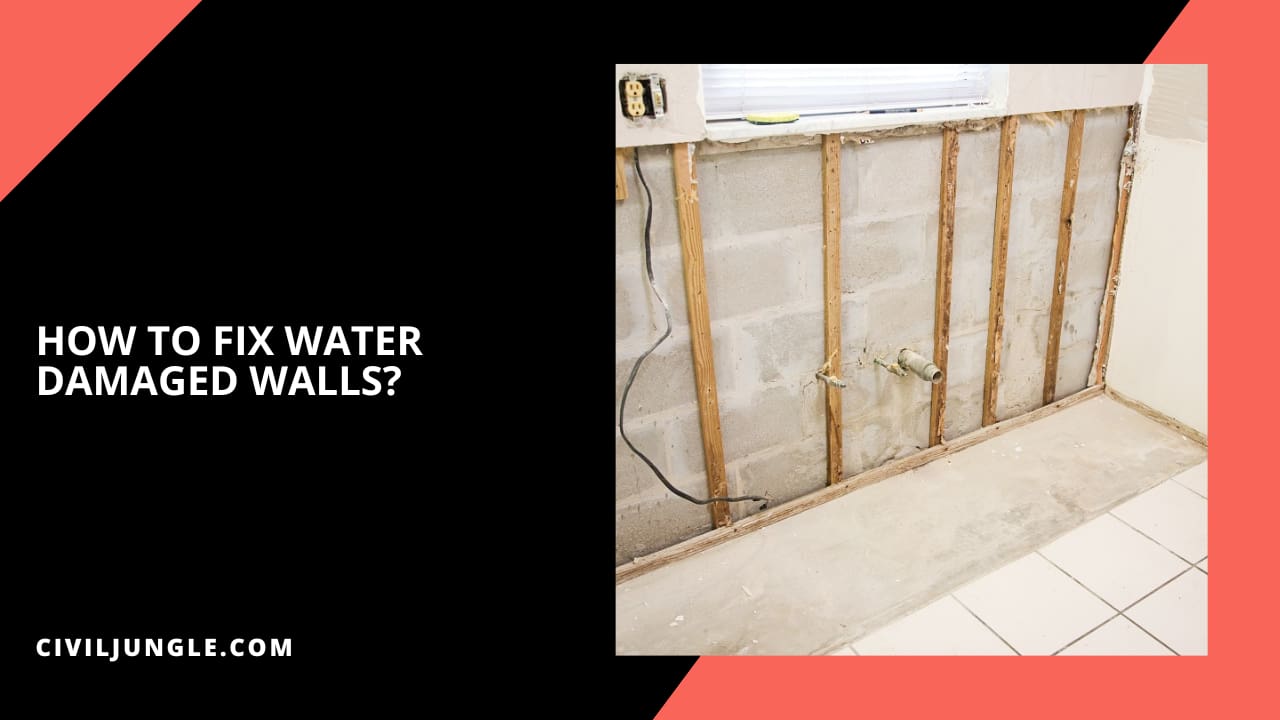
There are a few steps followed by civil engineers to fix the water damaged wall, those are-
1. Clean the Area
This is the first process among all the steps. In this step, we need to clear and clean the required place.
2. Find the Water Leak
Water leak detection from the wall is the first point of our object. The leak may be situated behind your wall. The walls always show some visible effects like a sign of moisture in the wall, falling structure integrity sign, etc. Water-damaged signs are visible in coffee-color strains sometimes.
At the time of working, always wear gloves, goggles, masks, etc. Detection of the leak is essential because, at the time of work, it will create huge problems. Sometimes you need to remove the whole wall to find out the internal source of water damage.
3. Water-Damaged Drywall Removal Process
Here, we need to start the second step, like collecting dry-wall pieces, dust, and debris to clean out the damaged drywall. After removing the water-damaged portions from the wall, it is wreaked bar by the end claw of a hammer. Then the wall panels are removed; sometimes, a keyhole saw is used to create a hole like a rectangular or square shape.
4. Repair Process
After that, holes are drilled at the four sides of that board. The holes are made by the drilling machine. In this step, at first, the rectangular or square areas are measured, then we place another piece for replacement purposes. Then a smooth coat of cement paste is applied before fixing those boards.
After completely drying the paste, we use sandpaper for the smooth finish of the surfaces and the edges of the wallboards. At last joint tape is used at the junction point of wallboards.
5. Prime and Paint
Here, coating prime and paint are applied to the surface. At first, we are applying ultra-premium paint by applying a paintbrush or roller. This coat generally protects the wall from other water damages.
Frequently Asked Questions (FAQ)
How Can I Detect If My Wall Has Water Damage?
Water damage in walls often manifests as discoloration, stains, peeling paint, or a musty odor. Look for visible signs such as coffee-colored stains or bubbling paint. Additionally, if you notice a sudden increase in moisture or feel a wall that’s unusually damp, these could be signs of water damage.
What Tools Do I Need for Repairing Water-Damaged Walls?
You will need a few essential tools, including a utility knife, pry bar, hammer, keyhole saw, drill, cement paste, sandpaper, joint tape, paintbrush or roller, and protective gear like gloves, goggles, and masks.
How Do I Find the Source of the Water Leak?
To find the source of a water leak, inspect areas around the wall for potential leaks in pipes, roofing, or windows. You may need to use moisture meters or thermal imaging tools. Sometimes, removing parts of the wall might be necessary to identify the leak.
What Should I Do If the Water Damage Is Extensive?
If the damage is extensive, it’s advisable to consult a professional contractor. Extensive damage may require more significant repairs, such as replacing large sections of drywall or addressing underlying issues like structural damage or mold growth.
How Long Does It Take to Repair Water-Damaged Walls?
The repair time can vary depending on the extent of the damage. Minor repairs might take a few hours to a day, while more extensive repairs could take several days. Ensure that you allow adequate drying time for cement paste and paint.
What Is the Average Cost of Repairing Water-Damaged Walls?
The cost of repairing water-damaged walls varies based on factors like the extent of the damage, material costs, and labor rates. On average, repairs can cost between $1,000 to $5,000, with a national average around $3,000.
Can I Paint Over Water-Damaged Walls?
Before painting, ensure that all water damage has been properly repaired and that the wall is fully dry. Applying primer and high-quality paint will help protect the wall from future water damage and ensure a smooth finish.
How Can I Prevent Future Water Damage to My Walls?
To prevent future water damage, ensure proper maintenance of your home’s plumbing, roofing, and insulation. Regularly inspect and repair any leaks, and ensure proper ventilation in areas prone to moisture buildup.