How to Replace A Fence Post Without Removing Concrete?
Replacing a fence post can be a daunting task, especially if the post is set in concrete. However, with the right tools and techniques, it is possible to replace a fence post without removing the concrete.
This can save you time and effort, as well as reduce the risk of damaging your fence or the surrounding area. In this article, we will outline the steps you can take to replace a fence post without removing the concrete.
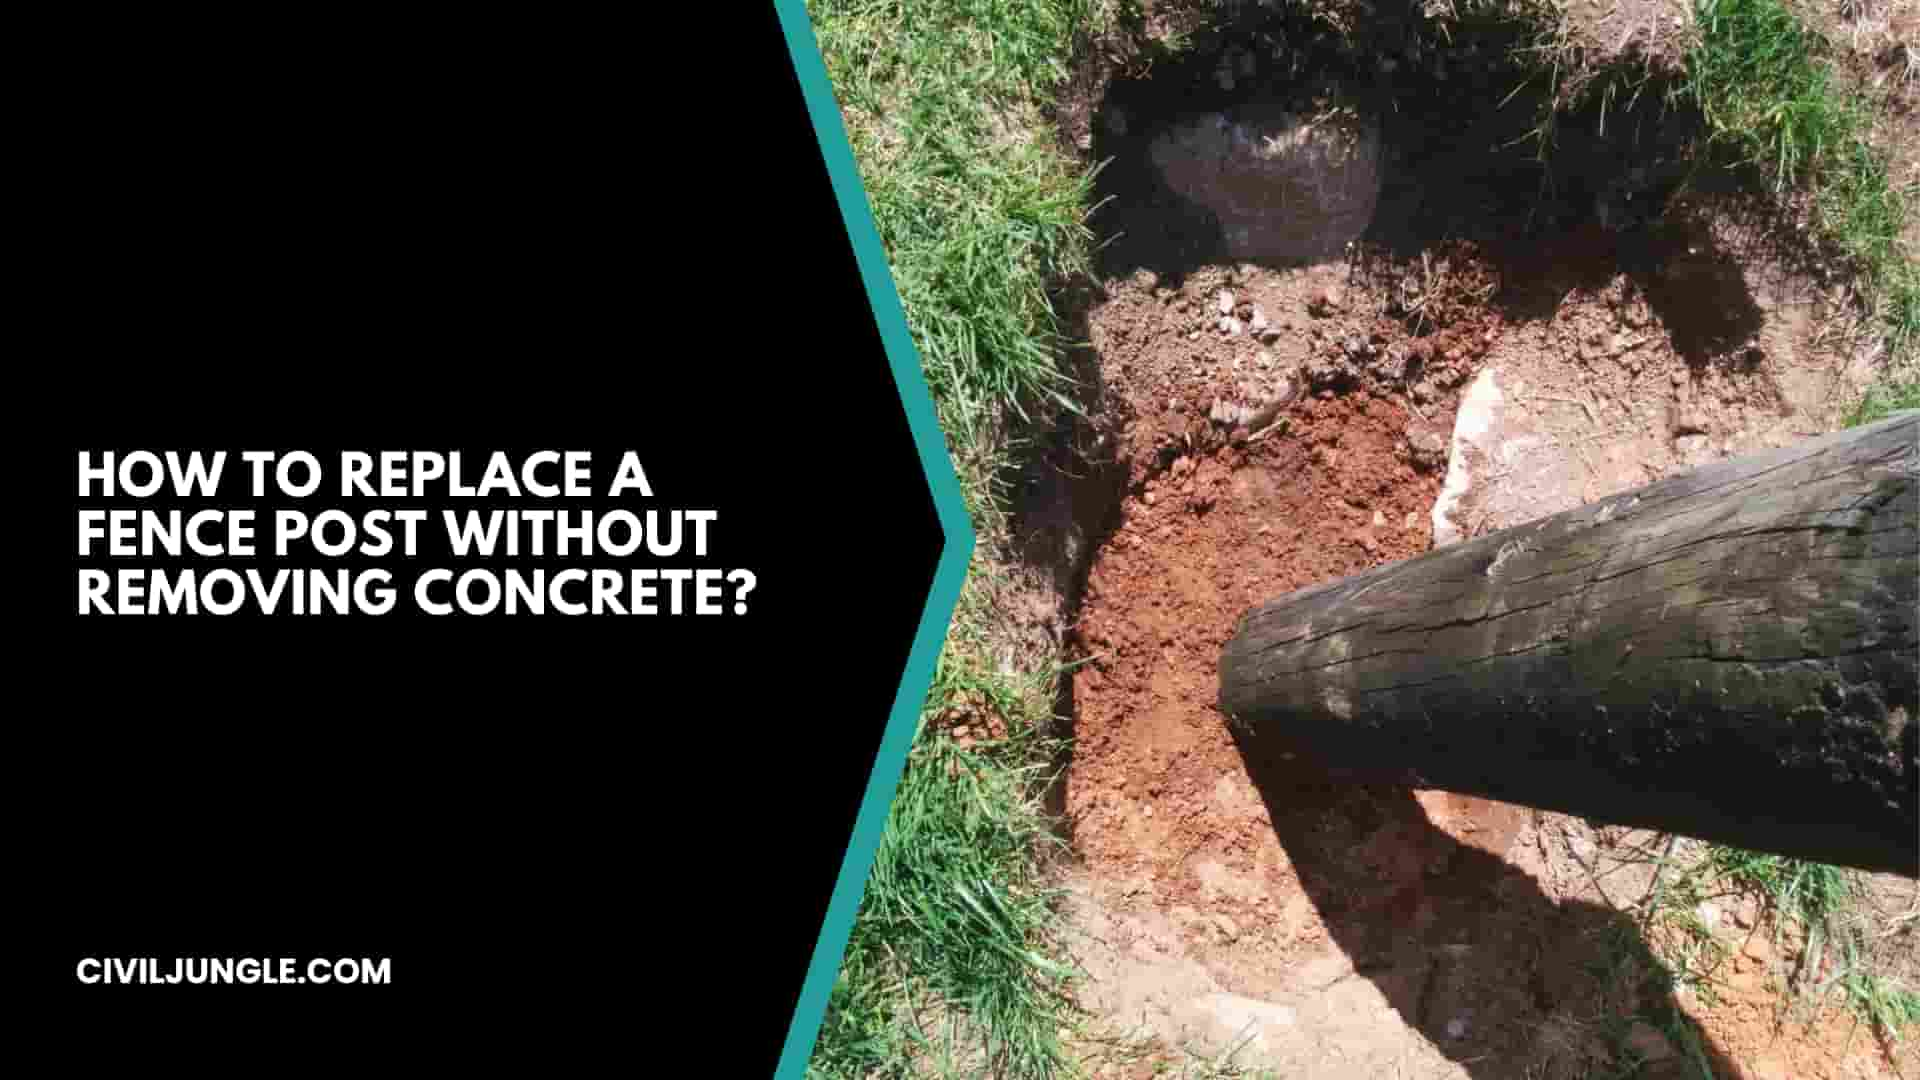
Step 1: Gather Your Tools and Materials
Before you begin, make sure you have all the tools and materials you will need. You will need a new fence post, a fence post repair bracket, a hammer, a drill, screws, a saw, a level, and a shovel.
You may also need additional materials such as wood or metal stakes, sand, and gravel, depending on the specific repair you are making.
Also Read: All About Privacy Fence | What Is a Privacy Fence | Types of Privacy Fences | Cost of Privacy Fences
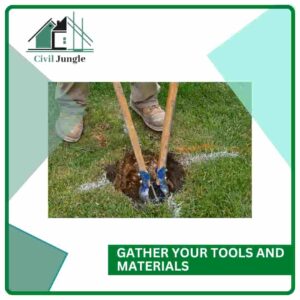
Step 2: Remove the Damaged Fence Post
The first step in replacing a fence post is to remove the damaged post. If the post is not too badly damaged, you may be able to cut it off using a saw.
However, if the post is severely damaged, you may need to use a hammer and chisel to remove it. Carefully remove any nails or screws that may be holding the post in place.
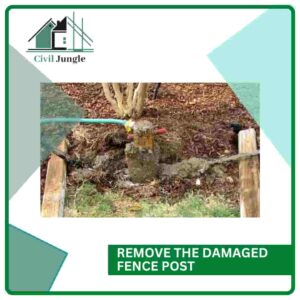
Step 3: Prepare the Hole for the New Fence Post
Next, you will need to prepare the hole for the new fence post. If the hole is filled with concrete, you will need to remove as much of the concrete as possible. You can do this using a shovel or a post-hole digger.
You may also need to use a hammer and chisel to break up any large pieces of concrete. Once you have removed as much of the concrete as possible, you should check the depth of the hole to ensure that it is deep enough to hold the new fence post.
Step 4: Install the Fence Post Repair Bracket
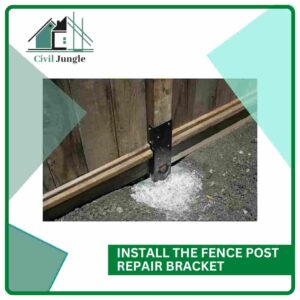
Once you have prepared the hole, you can begin to install the fence post-repair bracket. This is a metal bracket that is designed to hold the new fence post in place.
To install the bracket, you will need to drill screws through the bracket and into the old concrete. Make sure that the bracket is level and secure before you move on to the next step.
Step 5: Install the New Fence Post
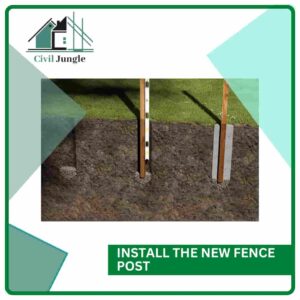
With the fence post repair bracket in place, you can now install the new fence post. Slide the new fence post into the bracket and secure it in place using screws or nails. Make sure that the fence post is level and straight before you continue.
Step 6: Secure the Fence Post
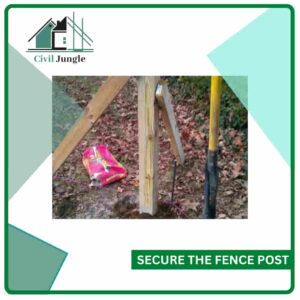
To further secure the fence post, you may want to add additional support in the form of wood or metal stakes. These stakes should be driven into the ground on either side of the fence post. You can then attach the fence post to the stakes using screws or nails.
Step 7: Fill in the Hole
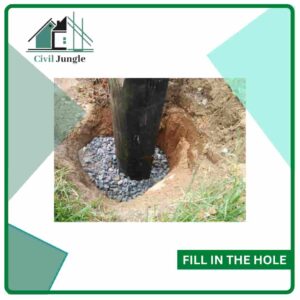
Once the new fence post is in place, you can fill in the hole with sand, gravel, or a mixture of both. This will help to hold the fence post in place and provide additional support. If you are using sand, you may need to moisten it before you fill in the hole to help it settle properly.
Step 8: Check for Stability

Before you finish, it is important to check the stability of the new fence post. You can do this by gently pushing on the post to see if it wobbles or moves. If the post is not stable, you may need to make additional adjustments or add additional support.
Also Read: What Color Siding Goes with the Red Brick | Siding and Brick House Cleaner
Removing The Fence Post And Concrete
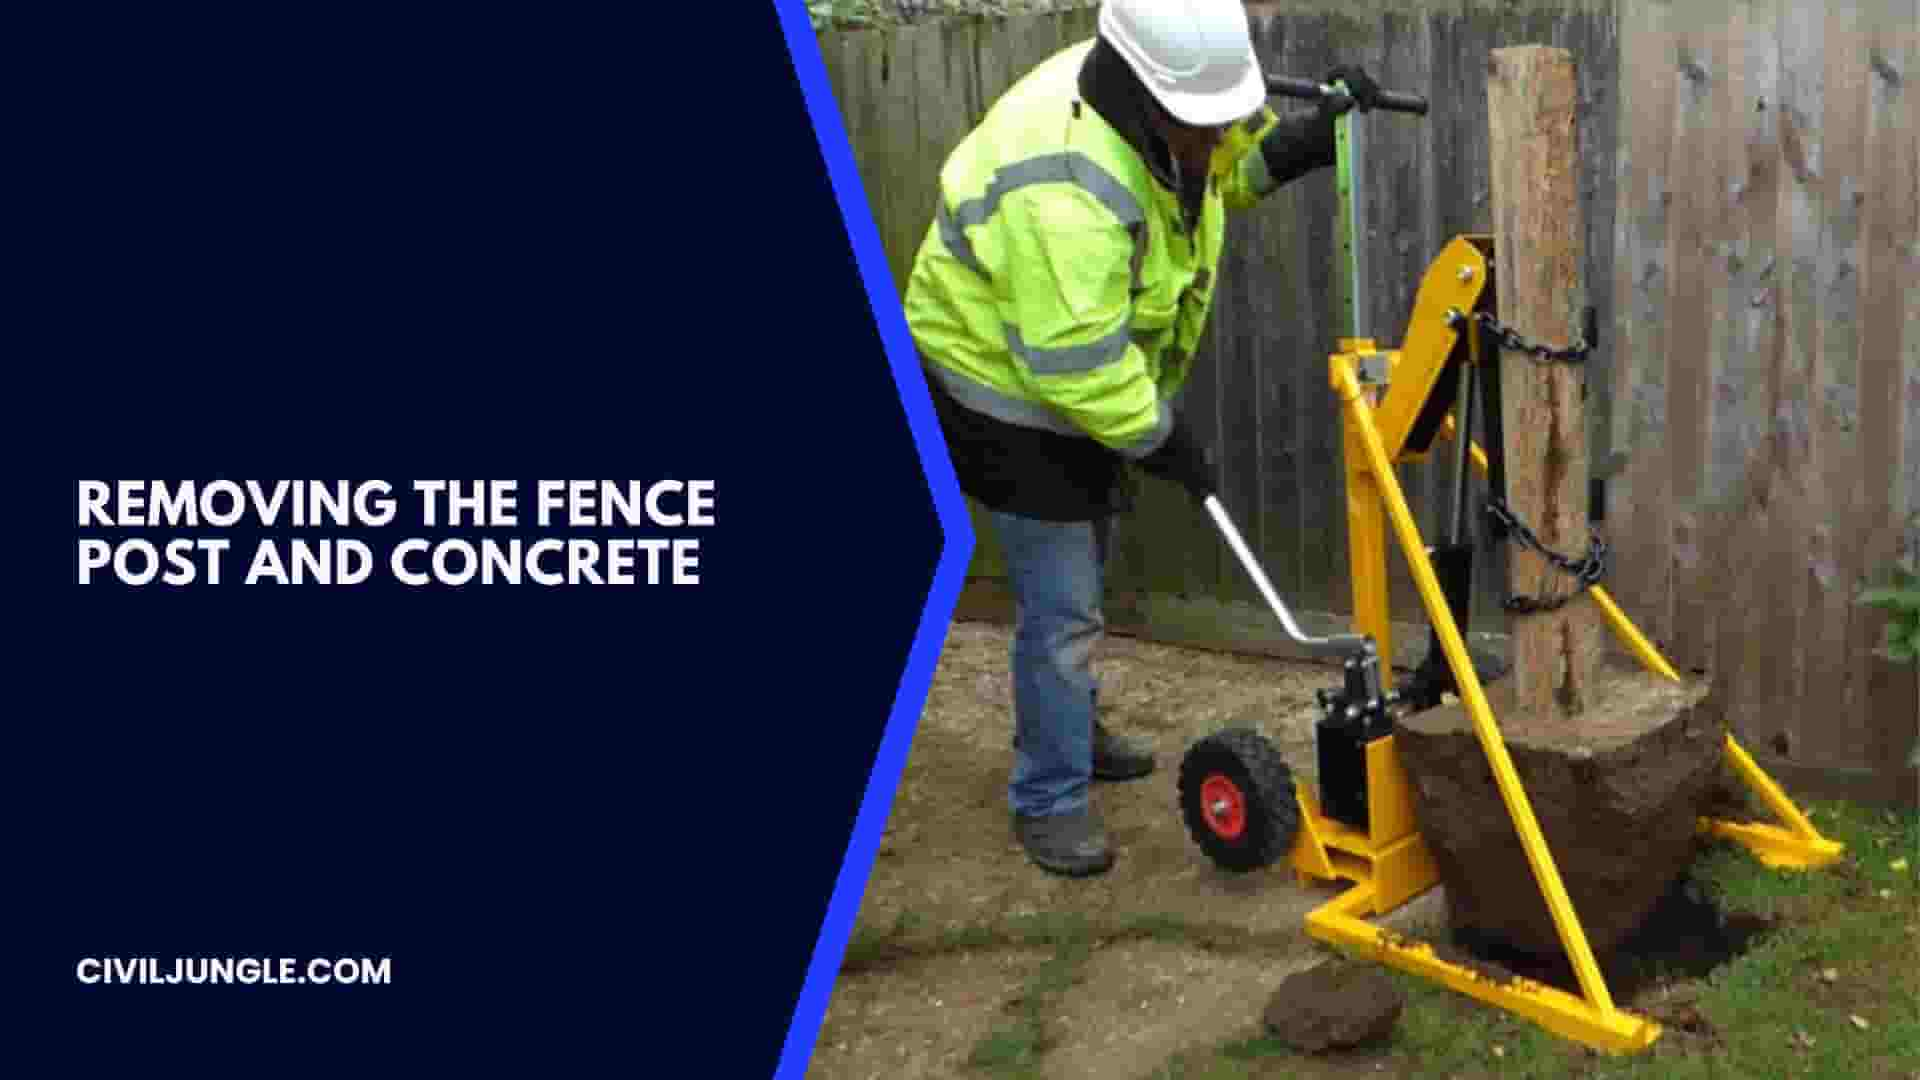
The replacement of the fence post is one of the most challenging tasks and when the old post is into the ground with the concrete. But with the help of the right tools and techniques we can replace the fence posts without removing the concrete.
The process involves measuring and marking the location of the new fence post, cutting the old post off at ground level, removing the old post, digging out the dirt and debris around the base of the old post, checking the depth of the old post hole, installing the new post, securing the new post in place with concrete, finishing the installation, and reattaching the fence panels.
By following these steps, you can easily replace a fence post without the need to remove the concrete, saving time and effort in the process.
Mistakes to Avoid for Removing The Fence Post And Concrete
Not measuring and marking the location of the new fence post: It is essential to measure and mark the location of the new fence post to ensure it is properly aligned with the rest of the fence. If the post is not properly aligned, it can cause issues with the stability and appearance of the fence.
Not wearing protective gear: When cutting the old fence post and breaking up the concrete, it is important to wear protective gear such as goggles, earplugs, gloves, and safety glasses to protect yourself from flying debris and injuries.
Not digging out the dirt and debris around the base of the old fence post: If you do not dig out the dirt and debris around the base of the old fence post, it can be difficult to install the new post and secure it in place with concrete.
Not checking the depth of the old fence post hole: The depth of the hole should be equal to at least one-third of the total length of the fence post. If the hole is not deep enough, the new fence post may not be stable.
Using the wrong type of concrete: Different types of concrete have different curing times and strength levels. Be sure to choose the right type of concrete for your project to ensure a successful installation.
Tips & Tricks for Removing The Fence Post And Concrete
Use a level to ensure the fence post is straight: A level can help you ensure the fence post is straight, which is essential for the stability and appearance of the fence.
Use shims to level the fence post: If the hole is not level, you can use shims to level the fence post before filling it with concrete.
Compact the soil around the base of the fence post: After installing the new fence post and filling the hole with concrete, you can use a tamper or a piece of wood to compact the soil around the base of the post.
Allow the concrete to cure according to the manufacturer’s instructions: Different types of concrete have different curing times, so it is important to follow the manufacturer’s instructions to ensure the concrete is properly cured before reattaching the fence panels.
Can I Replace a Fence Post Without Removing the Concrete?
Yes, it is possible to replace a fence post without removing the concrete. By cutting the old post off at ground level and digging out the dirt and debris around the base of the old post, you can create enough space to install a new post without disturbing the concrete.
What Tools Do I Need to Replace a Fence Post Without Removing the Concrete?
To replace a fence post without removing the concrete, you will need a new fence post, a drill, a concrete saw, a sledgehammer, a level, a pry bar, a shovel, and a wheelbarrow. You may also need additional tools depending on the size and type of fence post you are installing.
How Do I Secure the New Fence Post in Place?
To secure the new fence post in place, you will need to fill the hole with concrete. Mix the concrete according to the manufacturer’s instructions and pour it into the hole around the base of the fence post. Be sure to leave a few inches of space between the top of the concrete and the ground to allow for expansion.
How Do I Remove the Old Fence Post and Concrete?
To remove the old fence post and concrete, you will need to cut the post off at ground level and remove it from the ground using a pry bar. Then, dig out the dirt and debris around the base of the post and break up the concrete using a sledgehammer, a jackhammer, or a concrete saw. Finally, remove the pieces of concrete and clean up the area.
How Long Does It Take to Replace a Fence Post Without Removing the Concrete?
The length of time it takes to replace a fence post without removing the concrete will depend on the size and type of fence post, the condition of the old post and concrete, and the tools and equipment you are using. On average, the process can take several hours to a full day to complete.
Replacing Metal Fence Posts in Existing Concrete
Replacing metal fence posts in existing concrete can be a challenging task, but it is possible with the right tools and techniques. Here are the steps to follow:
- Remove the old metal fence post from the concrete. If the post is loose, you may be able to simply pull it out. If it is still firmly embedded in the concrete, you may need to use a saw or grinder to cut it off at ground level.
- Measure the dimensions of the hole left by the old post, including the diameter and depth.
- Purchase a new metal fence post that matches the dimensions of the old one.
- Use a hammer and chisel or drill to remove any remaining concrete from the hole, making sure to create a clean and level surface.
- Apply a concrete bonding agent to the inside of the hole, following the manufacturer’s instructions.
- Mix a small amount of quick-setting concrete according to the manufacturer’s instructions and pour it into the hole, filling it to a level that will allow the new post to be firmly set.
- Insert the new metal fence post into the hole, making sure it is level and plumb.
- Use a spirit level to check that the post is straight, and make any adjustments as necessary.
- Hold the post in place while the concrete sets, following the manufacturer’s instructions for setting time.
- Once the concrete has set, attach the fence panels or other hardware to the post, following the manufacturer’s instructions.
Can You Reuse Fence Posts with Concrete?
Posts with concrete at the base are the most difficult to remove and reuse because the concrete base is larger than the post, which makes pulling it up through the ground much harder.
Replace Fence Post Without Removing Concrete
The best way to replace a fence post without removing the concrete footing is by prying it out. You can do this with a long lever and fulcrum or a car jack. In either case, nail some wood to the post first to pry against and then get to work. Pry until the post releases from the concrete and comes all the way out.
Can You Put New Fence Posts in Old Holes?
Use the existing holes. Done it plenty of times. When the old post were put in i would expect that they dug a hole for them to go in and backfilled around the post, removing the post will disturb an area less than the original hole that was dug. Unless you are using some extreme measures to remove them.
How Do You Repair Rotting Wood Post Without Replacing It?
You can repair rotten wood by first removing the rotting from the original board or joists. You can then fill the surrounding area with a soft wood polyester filler or wood patch using a plastic putty knife. This material fills the area and cures to ensure strength and resilience.
Are Fence Posts Set in Concrete?
Whether you’re building a fence, setting a mailbox or even a basketball goal, the best way to ensure your posts will stay sturdy and true for years is to set them in concrete.
Remove Broken Fence Post from Concrete
There are a few ways to make this task a little easier. One of the best methods for digging out fence posts by hand is to only remove the dirt around one “face” of the fence post. By digging slightly deeper than the base of the concrete, you can then tip the post into the hole and lift it out.
Remove Fence Post Without Jack
If you don’t have a jack, (but you do have a helper) you can simply lift on both sides of the bar. Two strong workers lifting from their legs can pull up almost any fence post in this fashion.
Repairing a Fence Post Without Removing Concrete
The best way to replace a fence post without removing the concrete footing is by prying it out. You can do this with a long lever and fulcrum or a car jack. In either case, nail some wood to the post first to pry against and then get to work. Pry until the post releases from the concrete and comes all the way out.
Replacing a Broken Fence Post Without Removing Concrete
To replace a broken fence post without removing the concrete, follow these steps:
- Assess the damage: Determine the extent of the damage to the broken post.
- Purchase a replacement post: Measure the dimensions of the broken post and buy a new one that matches.
- Prepare the new post: Trim or adjust the new post if needed to match the height of the existing fence.
- Attach a bracket: Install a post bracket or repair spur on the side of the broken post that is still intact. The bracket should be compatible with the new post.
- Insert the new post: Slide the new post into the bracket or repair spur, ensuring it is level and properly aligned with the fence.
- Secure the new post: Use screws or bolts to secure the new post to the bracket or repair spur. Make sure it is tightly fastened.
- Remove any remaining debris: Clear any debris from the broken post and surrounding area.
- Reinforce if necessary: If the new post feels
How to Replace a Fence Post in Concrete?
To replace a fence post that is set in concrete, follow these steps:
- Gather the necessary tools and materials: You will need a new post, a post hole digger, a shovel, a level, a pry bar or post puller, a sledgehammer, gravel or concrete mix, a tape measure, and a helper if possible.
- Remove the damaged post: If the post is broken or damaged, you will first need to remove it. Use a pry bar or post puller to loosen the post from the concrete. If necessary, cut the post near ground level to make removal easier.
- Dig a new hole: Use a post hole digger to dig a new hole beside the existing concrete footing. The hole should be deep enough to accommodate approximately one-third of the new post’s length, plus a few inches for gravel or concrete footing.
- Prepare the new post: Trim the new post to the appropriate height if needed. Measure the depth of the existing concrete footing and mark the new post at that measurement. This will ensure that the post will be set at the same depth as the original one.
- Install the new post: Place the new post into the hole, making sure it is level and aligned with the fence line. Have a helper hold the post in place if possible.
- Fill the hole: Add gravel or concrete mix around the post to provide stability. If using concrete mix, follow the manufacturer’s instructions for mixing and pouring. Use a level to ensure the post remains plumb and straight as the hole is filled.
- Allow the concrete to cure: Let the concrete cure according to the manufacturer’s instructions before applying any tension or weight to the post. This usually takes at least 24 hours.
- Reattach the fence: Once the concrete has cured, reattach the fence panels or rails to the new post using appropriate fasteners.
By following these steps, you can effectively replace a fence post that is set in concrete.
Fixing a Fence Post in Concrete Without Removal
If you need to fix a fence post that is set in concrete without removing the concrete, you can try the following steps:
- Assess the damage:
- Reinforce the existing post:
- Fill gaps or cracks:
- Secure the fence to the post:
- Provide additional support:
- Monitor and maintain:
While these steps can help address minor issues with a fence post set in concrete, it’s important to note that if the post is severely damaged or the concrete footing has deteriorated, a more extensive repair or replacement may be necessary.
Methods for Replacing a Fence Post Without Breaking Concrete
If you need to replace a fence post without breaking the concrete, there are a few methods you can try:
- Fence Post Repair Spike: A fence post repair spike is a metal bracket that can be driven into the ground next to the existing post. It has flanges that hold the new post in place. You’ll need to remove any remaining parts of the old post and drive the repair spike into the ground until it is secure. Then, insert the new post into the repair spike and secure it with screws or bolts.
- Fence Post Extender: A fence post extender is a metal sleeve that fits over the existing post and extends above the concrete. You can find various sizes to match your post diameter. Remove any broken parts of the old post and slide the extender over the remaining portion, ensuring it’s level and aligned with the existing fence. Secure the extender to the old post using screws or brackets. Then, insert a new post into the extender and fasten it securely.
- Fence Post Bracket: A fence post bracket is a metal bracket that attaches to the existing post and provides a platform for the new post. Remove any broken parts of the old post and attach the bracket to the remaining portion of the post using screws or bolts. Then, insert the new post into the bracket and secure it with screws or bolts.
These methods allow you to replace a fence post without breaking the concrete. They provide stability and support for the new post while utilizing the existing concrete footing. Make sure to choose the appropriate method based on your specific situation and follow the manufacturer’s instructions for installation.
Techniques to Replace a Fence Post Without Digging Up Concrete
If you need to replace a fence post without digging up the concrete, you can try the following techniques:
- Cutting and Removal: If the fence post is broken or damaged near the ground level, you can cut off the top portion of the post above the concrete using a reciprocating saw or a hacksaw. Once the top part is removed, you can use a pry bar or a post puller to extract the remaining part of the post from the concrete footing.
- Concrete Anchors: Another method is to use concrete anchors to secure a new post in place without removing the old post or digging up the concrete. Here’s how you can do it:
- Clean the existing post: Remove any debris, loose material, or protruding parts from the old post to ensure a clean surface.
- Position the new post: Place the new post next to the existing post, ensuring it is aligned with the fence line.
- Attach the concrete anchors: Use concrete anchor brackets or straps to attach the new post to the old post. The brackets or straps should be positioned in a way that allows them to be secured to the concrete footing.
- Secure the new post: Insert screws or bolts through the brackets or straps and tighten them to secure the new post to the concrete anchors.
- Level and align: Use a level to ensure the new post is plumb and adjust as needed. Make sure it aligns properly with the existing fence.
- Post Support System: Another option is to use a post support system designed to anchor posts without digging up concrete. These systems typically consist of a metal bracket or base that is secured to the concrete footing, and a post sleeve that fits into the bracket. The post sleeve can be adjusted to the desired height and secured in place.
- Install the post support system: Follow the manufacturer’s instructions to install the post support system onto the existing concrete footing.
- Insert the new post: Slide the new post into the post sleeve of the support system, ensuring it is level and aligned with the fence.
- Secure the new post: Use screws or bolts provided with the post support system to secure the new post to the support bracket or base.
These techniques allow you to replace a fence post without the need to dig up the concrete footing. However, it’s important to note that the stability and strength of the replacement post will depend on the condition of the existing concrete and the effectiveness of the chosen method.
Step-By-Step Guide to Replacing a Fence Post Without Removing Concrete
Here’s a step-by-step guide to replacing a fence post without removing the concrete:
- Assess the damage: Determine the extent of the damage to the post and identify the areas that need repair or replacement.
- Prepare the new post: Purchase a new post that matches the dimensions and material of the existing post. Trim the new post to the appropriate height if needed.
- Clear the area: Remove any debris, vegetation, or obstructions around the damaged post to provide clear access.
- Support the fence: If the damaged post is holding up sections of the fence, use temporary braces or supports to hold the fence in place while you work.
- Cut the damaged post: Using a reciprocating saw or a hacksaw, cut the damaged post off near the ground level. Take care to avoid cutting into the concrete.
- Remove the remaining post: Use a pry bar or a post puller to extract the remaining part of the post from the concrete footing. Apply steady and controlled force to loosen and remove the post. If the post is stubborn, you can use a sledgehammer to help loosen it.
- Prepare the hole: Clean out any debris or loose material from the hole left by the removed post. Ensure the hole is free of any obstructions.
- Position the new post: Place the new post into the hole, aligning it with the fence line. Ensure the post is plumb and level. You can use a level to check for vertical alignment.
- Fill the hole: Pour or shovel concrete mix or gravel into the hole around the new post to provide stability and support. Follow the manufacturer’s instructions for mixing and pouring the concrete, or use gravel for a quicker solution.
- Pack and compact: Use a tamper or a block of wood to pack and compact the concrete or gravel around the new post. This will ensure it is firmly in place.
- Check alignment: Double-check the alignment and verticality of the new post using a level. Make any necessary adjustments before the concrete sets.
- Allow for curing: Give the concrete ample time to cure and harden according to the manufacturer’s instructions. This typically takes at least 24 to 48 hours. During this time, avoid applying tension or pressure to the post.
- Reattach the fence: Once the concrete has fully cured, reattach the fence panels or rails to the new post using appropriate fasteners.
- Remove temporary supports: If you used temporary braces or supports, remove them carefully once the fence is securely attached to the new post.
By following these steps, you can effectively replace a fence post without the need to remove the concrete. Ensure you take appropriate safety precautions, such as wearing protective gear and using proper tools, throughout the process.
Replacing Wooden Fence Post in Concrete Without Excavation
To replace a wooden fence post set in concrete without excavation, you can follow these steps:
- Assess the damage: Determine the extent of the damage to the wooden fence post and identify the areas that need repair or replacement.
- Remove the fence panel: If the fence panel is attached to the damaged post, remove it by unscrewing or unfastening the brackets or screws that hold it in place.
- Cut the damaged post: Use a reciprocating saw or a hacksaw to cut the damaged post near the ground level. Take care to avoid cutting into the concrete.
- Prepare the new post: Purchase a new wooden post that matches the dimensions of the existing post. Trim the new post to the appropriate height if needed.
- Attach a post bracket: Install a post bracket or repair spur on the side of the damaged post that is still intact. The bracket should be compatible with the new post.
- Insert the new post: Slide the new post into the post bracket or repair spur, ensuring it is level and properly aligned with the fence line.
- Secure the new post: Use screws or bolts to secure the new post to the bracket or repair spur. Make sure it is tightly fastened.
- Fill the gap: If there is a gap between the new post and the existing concrete, fill it with a concrete patching compound or an epoxy filler. This will provide additional stability and prevent water from entering the gap.
- Allow for curing: Let the patching compound or epoxy filler cure according to the manufacturer’s instructions. This typically takes a few hours to a day.
- Reattach the fence panel: Once the patching compound or epoxy has fully cured, reattach the fence panel to the new post using appropriate fasteners.
By following these steps, you can replace a wooden fence post set in concrete without the need for excavation. Ensure you take appropriate safety precautions and use the proper tools throughout the process.
Innovative Ways to Replace a Fence Post Without Disturbing Concrete
While replacing a fence post without disturbing the concrete usually involves traditional methods, there are a few innovative approaches you can consider:
- Helical Piles or Screw Piles: Helical piles or screw piles are long metal shafts with helical blades at the bottom. These piles can be driven into the ground next to the existing post, providing a stable foundation for a new post. The helical blades cut into the soil or concrete as they are screwed in, creating a secure anchor. Once the pile is in place, a bracket or connector can be attached to support the new post.
- Concrete Anchors with Brackets: Concrete anchors with brackets are specialized devices designed to connect a new post to the existing concrete. These anchors have expanding mechanisms that grip the inside of the concrete once installed. Brackets are attached to the anchor, allowing you to secure the new post in place. These anchors can provide a strong and stable connection without the need for excavation.
- Post Jackets or Sleeves: Post jackets or sleeves are hollow metal or composite covers that fit over the existing post. They provide added strength and protection, and can also extend the height of the post if needed. By sliding a post jacket over the damaged post, you can reinforce it without disturbing the concrete. This method is particularly useful when the post is still structurally sound but needs additional support.
- Composite Post Replacement: Another innovative approach is to replace the damaged wooden post with a composite post. Composite posts are made from a combination of wood fibers and recycled plastic. These posts are highly durable, resistant to rot, and can be secured to the existing concrete footing using brackets or anchors. Composite posts are lightweight and easy to work with, making them a convenient option for replacing fence posts without disturbing the concrete.
Remember to choose methods and materials suitable for your specific situation and follow the manufacturer’s instructions for installation.
Alternative Methods for Replacing a Fence Post Without Concrete Removal
If you’re looking for alternative methods to replace a fence post without removing concrete, here are a few options:
- Post Mender or Repair Spur:
- Ground Spikes or Anchors:
- Adhesive Anchors:
- Fence Post Support Systems:
These alternative methods provide options for replacing a fence post without the need to remove concrete. Consider the specific requirements of your project and choose the method that best suits your needs. Ensure you follow the manufacturer’s instructions for installation and use appropriate safety measures.
Diy Solutions for Replacing a Fence Post Without Removing the Concrete Base
If you’re looking for DIY solutions to replace a fence post without removing the concrete base, here are a few options:
- Sleeve Over Method: This method involves placing a new post sleeve over the existing post. The sleeve can be made of PVC, metal, or wood. Cut the existing post below ground level, leaving a stub to serve as a guide. Slide the sleeve over the stub, ensuring it fits snugly. Secure the sleeve to the existing post using screws or adhesive. Then, insert the new post into the sleeve and secure it with screws or brackets.
- Concrete Pier Block: A concrete pier block can be used as a base for a new post. Dig a small hole next to the existing concrete base. Place the pier block in the hole and level it. Attach a metal bracket or post anchor to the pier block using concrete screws or bolts. Insert the new post into the bracket or anchor and secure it with screws or bolts.
- Adjustable Post Support: An adjustable post support is a metal bracket with a base that can be adjusted to fit different post sizes. Dig a small hole next to the existing concrete base and place the adjustable post support in the hole. Level the bracket and secure it with concrete screws or bolts. Insert the new post into the bracket and secure it with screws or bolts.
- Tensioned Cable System: This method involves using a tensioned cable system to support the new post. Install a post anchor or bracket on the existing concrete base. Attach a cable system, consisting of steel cables and turnbuckles, to the anchor or bracket. Run the cables from the anchor or bracket to the top of the new post. Tighten the turnbuckles to create tension and provide support for the new post.
Remember to choose materials and methods that are suitable for your specific situation and follow appropriate safety guidelines. These DIY solutions offer alternatives to removing the concrete base when replacing a fence post.
Repair Options for a Fence Post in Concrete Without Dismantling
If you need to repair a fence post in concrete without dismantling the entire fence, there are a few options available:
- Epoxy Injection: Epoxy injection is a method used to repair cracks or damage in concrete. It involves injecting epoxy resin into the cracks or gaps around the base of the fence post. The epoxy fills and seals the damaged areas, providing strength and stability. This method is suitable for minor cracks or small areas of damage.
- Concrete Patching: If the concrete around the fence post has deteriorated or chipped, you can use a concrete patching compound to repair it. Clean the damaged area thoroughly and apply the patching compound according to the manufacturer’s instructions. Smooth the compound to match the surrounding concrete, and allow it to cure properly.
- Reinforcement Brackets: Reinforcement brackets can be used to strengthen a weakened or wobbly fence post. These brackets are typically made of metal and are designed to be attached to the existing post and embedded in the concrete. They provide additional support and stability to the post.
- Post Caps: Post caps are decorative covers that fit on top of the fence post. While they don’t repair the concrete directly, they can help protect the top of the post from further damage caused by weathering and moisture. This can prevent the post from deteriorating further and extend its lifespan.
Before attempting any repairs, assess the extent of the damage to determine the most suitable method. It’s important to note that these repair options are best suited for minor damage or reinforcement and may not be suitable for severe structural issues. If the post is significantly compromised or the concrete is extensively damaged, it may be necessary to consider more substantial repairs or replacement.
Creative Ways to Replace a Fence Post Without Disrupting the Concrete Foundation
If you’re looking for creative ways to replace a fence post without disrupting the concrete foundation, consider the following options:
- Splitting the Concrete: Instead of removing the entire concrete foundation, you can use a concrete saw or jackhammer to carefully split the concrete around the existing post. This creates a gap where you can remove the old post and insert a new one. Once the new post is in place, use an epoxy or concrete filler to patch the split in the concrete.
- Post Extenders: If the existing fence post is still structurally sound but too short, you can use post extenders to increase its height. Post extenders are metal or PVC sleeves that fit over the existing post, providing additional height. Secure the extender to the old post with screws or adhesive. Then, attach the new post to the top of the extender and secure it in place.
- Cantilevered Post: A cantilevered post is a method where a new post is attached to the side of the existing post, extending it above ground level. This technique involves attaching a bracket to the side of the existing post and securing the new post to the bracket. Make sure to use sturdy brackets and proper fasteners to ensure stability.
- Reinforced Concrete Collar: If the existing post is still in good condition but lacks stability, you can reinforce it with a concrete collar. Create a form around the base of the post using plywood or other suitable materials. Pour fresh concrete into the form, ensuring it surrounds the base of the post. Smooth the concrete surface and allow it to cure. This provides additional support and stability to the post.
- Helical Anchors: Helical anchors are large, screw-like devices that can be drilled into the ground next to the existing post. The helical anchors provide stability and support for a new post. Attach a bracket or connector to the anchor and secure the new post in place. This method is particularly useful when dealing with loose or unstable soil.
Remember to consider the specific requirements of your fence and the condition of the existing post when choosing a creative method for replacement. Always prioritize safety and follow proper installation techniques.
Tips for Replacing a Damaged Fence Post Without Disturbing the Existing Concrete
When replacing a damaged fence post without disturbing the existing concrete, consider the following tips:
- Assess the Damage: Examine the extent of the damage to the fence post and identify the specific areas that need repair or replacement. This will help you determine the best approach for replacing the post.
- Choose the Right Replacement Post: Select a replacement post that matches the dimensions and material of the existing post. It should be the same height and thickness to ensure a seamless replacement.
- Cut the Damaged Post: Use a reciprocating saw or a hacksaw to cut the damaged post near the ground level. Take care not to damage the surrounding concrete while cutting.
- Remove the Remaining Post: Depending on the condition of the post, you may be able to extract the remaining portion without disturbing the concrete. Use a pry bar, post puller, or a combination of these tools to carefully remove the post. Apply steady and controlled force, taking care not to damage the concrete.
- Clean the Area: Once the old post is removed, clean the area around the concrete footing. Remove any debris, nails, or remnants of the old post to ensure a clean working surface.
- Fit the Replacement Post: Position the replacement post in the same location as the old post, ensuring it is aligned with the fence line. Check for plumbness and make any necessary adjustments.
- Secure the Post: Depending on the type of post and the condition of the concrete, there are several options to secure the replacement post. Some options include using adjustable post anchors, metal brackets, or specialized fence post repair products. Follow the manufacturer’s instructions for installation.
- Allow for Curing: If you used any adhesive or concrete filler during the installation, allow it to cure fully according to the manufacturer’s instructions. This ensures the post is securely in place before reattaching the fence panels.
- Reattach the Fence Panels: Once the replacement post is secure, reattach the fence panels using appropriate screws, nails, or brackets. Ensure the panels are level and properly aligned with the new post.
By following these tips, you can replace a damaged fence post without disturbing the existing concrete. However, keep in mind that the success of the replacement may depend on the condition of the concrete and the specific requirements of your fence.
Tools and Techniques to Replace a Fence Post Without Breaking Up the Concrete
To replace a fence post without breaking up the concrete, you will need the following tools and techniques:
- Tools:
- Reciprocating saw or hacksaw: To cut the damaged post near ground level.
- Pry bar or post puller: To remove the remaining portion of the old post.
- Shovel: To dig around the post if needed.
- Level: To ensure the replacement post is plumb.
Screwdriver, drill, or impact driver: To attach the replacement post to the existing concrete or brackets.
- Techniques:
- Cut the damaged post: Use a reciprocating saw or hacksaw to cut the damaged post close to the ground level. Take care not to damage the surrounding concrete while cutting.
- Remove the remaining post: Use a pry bar or post puller to carefully extract the remaining portion of the old post. Apply controlled force and be cautious not to damage the concrete.
- Prepare the replacement post: Choose a replacement post that matches the dimensions and material of the old post. Trim the replacement post to the appropriate height if needed.
- Position the replacement post: Place the replacement post in the same location as the old post, ensuring it is aligned with the fence line. Use a level to check for plumbness and make any necessary adjustments.
- Attach the replacement post: Depending on the condition of the concrete and the type of post, there are several methods to secure the replacement post. Options include using adjustable post anchors, metal brackets, or specialized fence post repair products. Follow the manufacturer’s instructions for installation.
- Test and adjust: Once the replacement post is attached, ensure it is stable and properly aligned. Make any necessary adjustments to ensure it is secure and level.
- Reattach the fence panels: Once the replacement post is secure, reattach the fence panels using appropriate screws, nails, or brackets. Ensure the panels are level and properly aligned with the new post.
By using these tools and techniques, you can replace a fence post without the need to break up the existing concrete. Remember to prioritize safety and follow the manufacturer’s instructions for any specialized products or materials used in the process.
Like this post? Share it with your friends!
Suggested Read –
- Strap Beams
- Concrete Pile Caps
- What Is Pitched Roof | 8 Types of Pitched Roof | Advantages of Pitched Roof
- Mivan Shuttering | Merit & Demerit Mivan Technology | Mivan Formwork Assembly Process
- How Much Does a Yard of Concrete Weigh | Concrete Weight Per Cubic Foot | Weight of Wet Vs. Dry Concrete
- What Is Sewerage System | Types of Sewerage System | Why We Need a Partially Separate System | How Does a Sewage Treatment Plant Work
- Kerbs In Roads | Types of Kerbs | Shape of Kerbs | Materials of Kerbs in Roads | Kerb Height | What Is Kerb Stone | Materials of Kerb Stone | Road Kerb Details