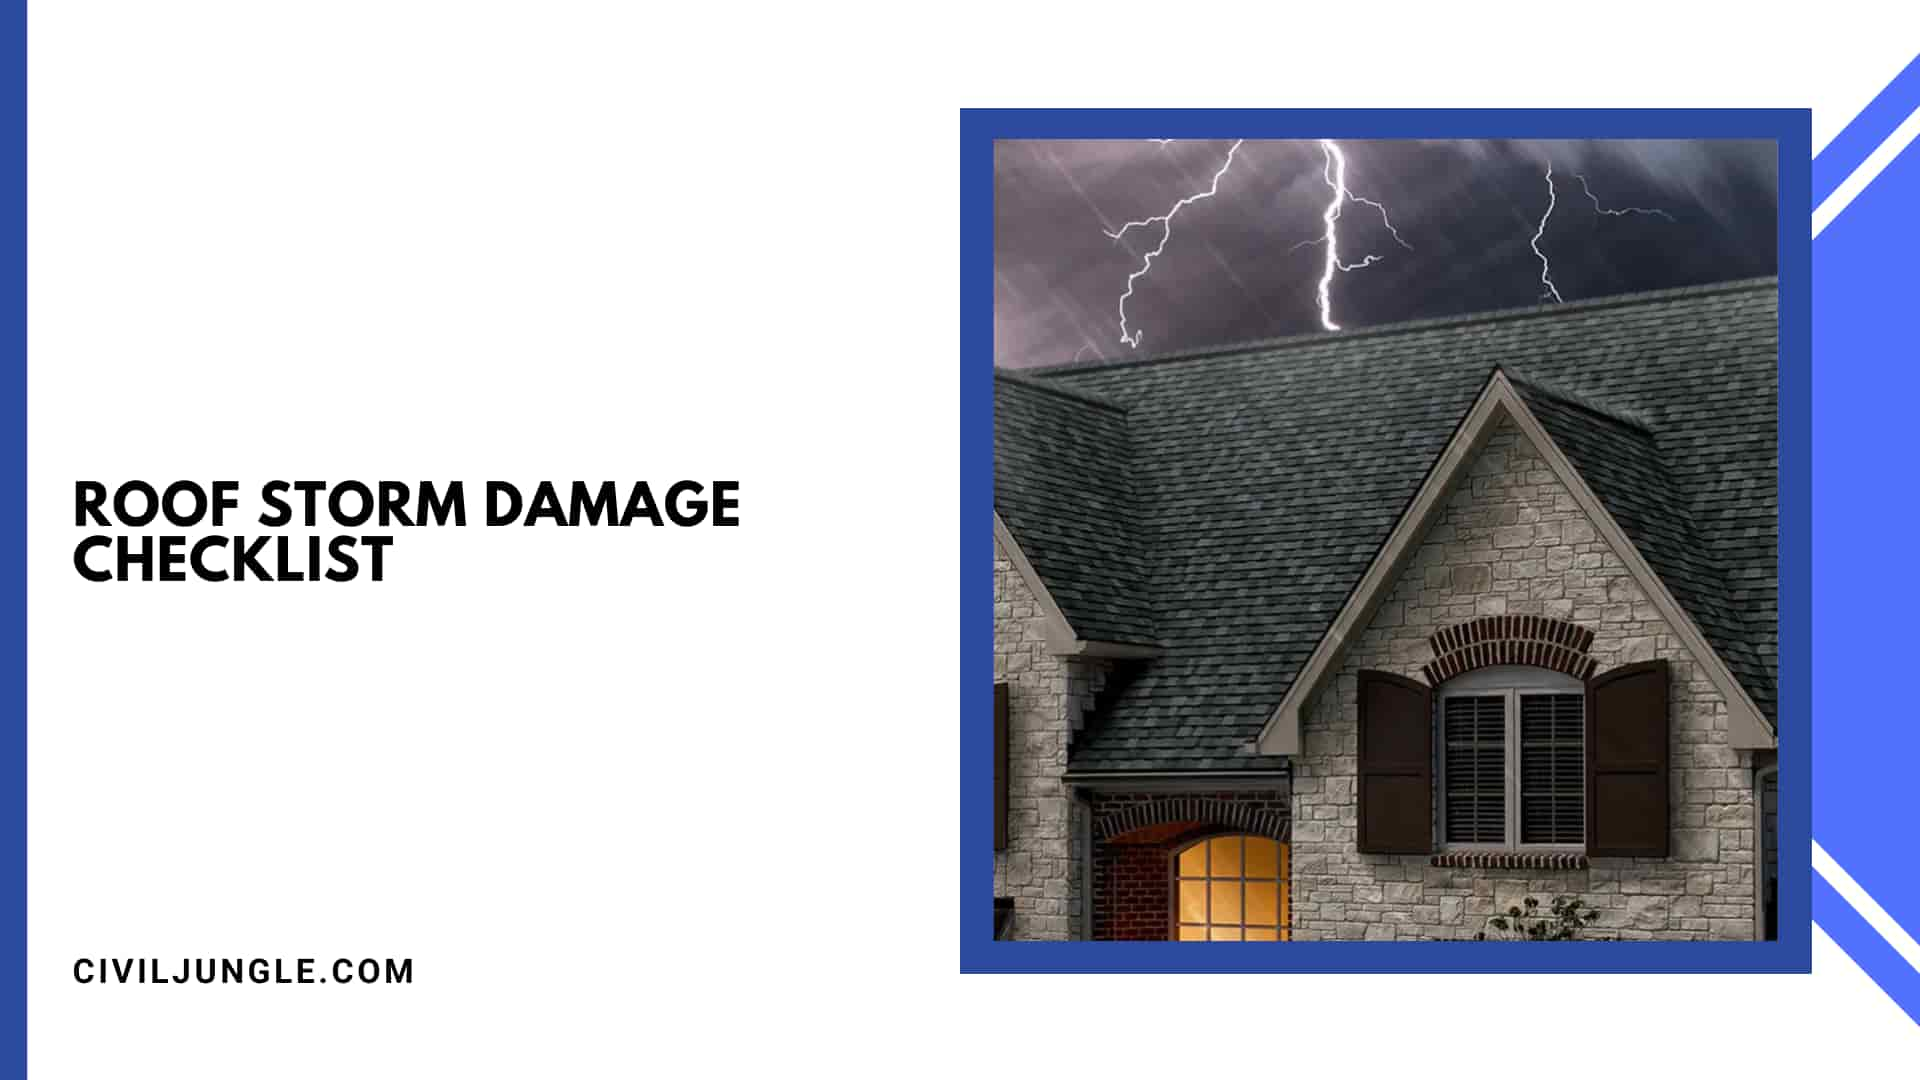
Introduction of Roof Storm Damage Checklist
This article serves as a wind damage roof inspection guide, providing essential steps to follow after a storm damages your roof. Generally, a roof is replaced after thirty years; in the real world, there are so many things that can damage your roof, and repair, or inspection work is needed.
In America, there is a huge problem due to storms where roof repair work is required. In your country, if there is no massive issue with the storm, you can also follow those steps. So, here are some steps for roof storm damage prevention and repair.
What to Do After a Storm on Roof?
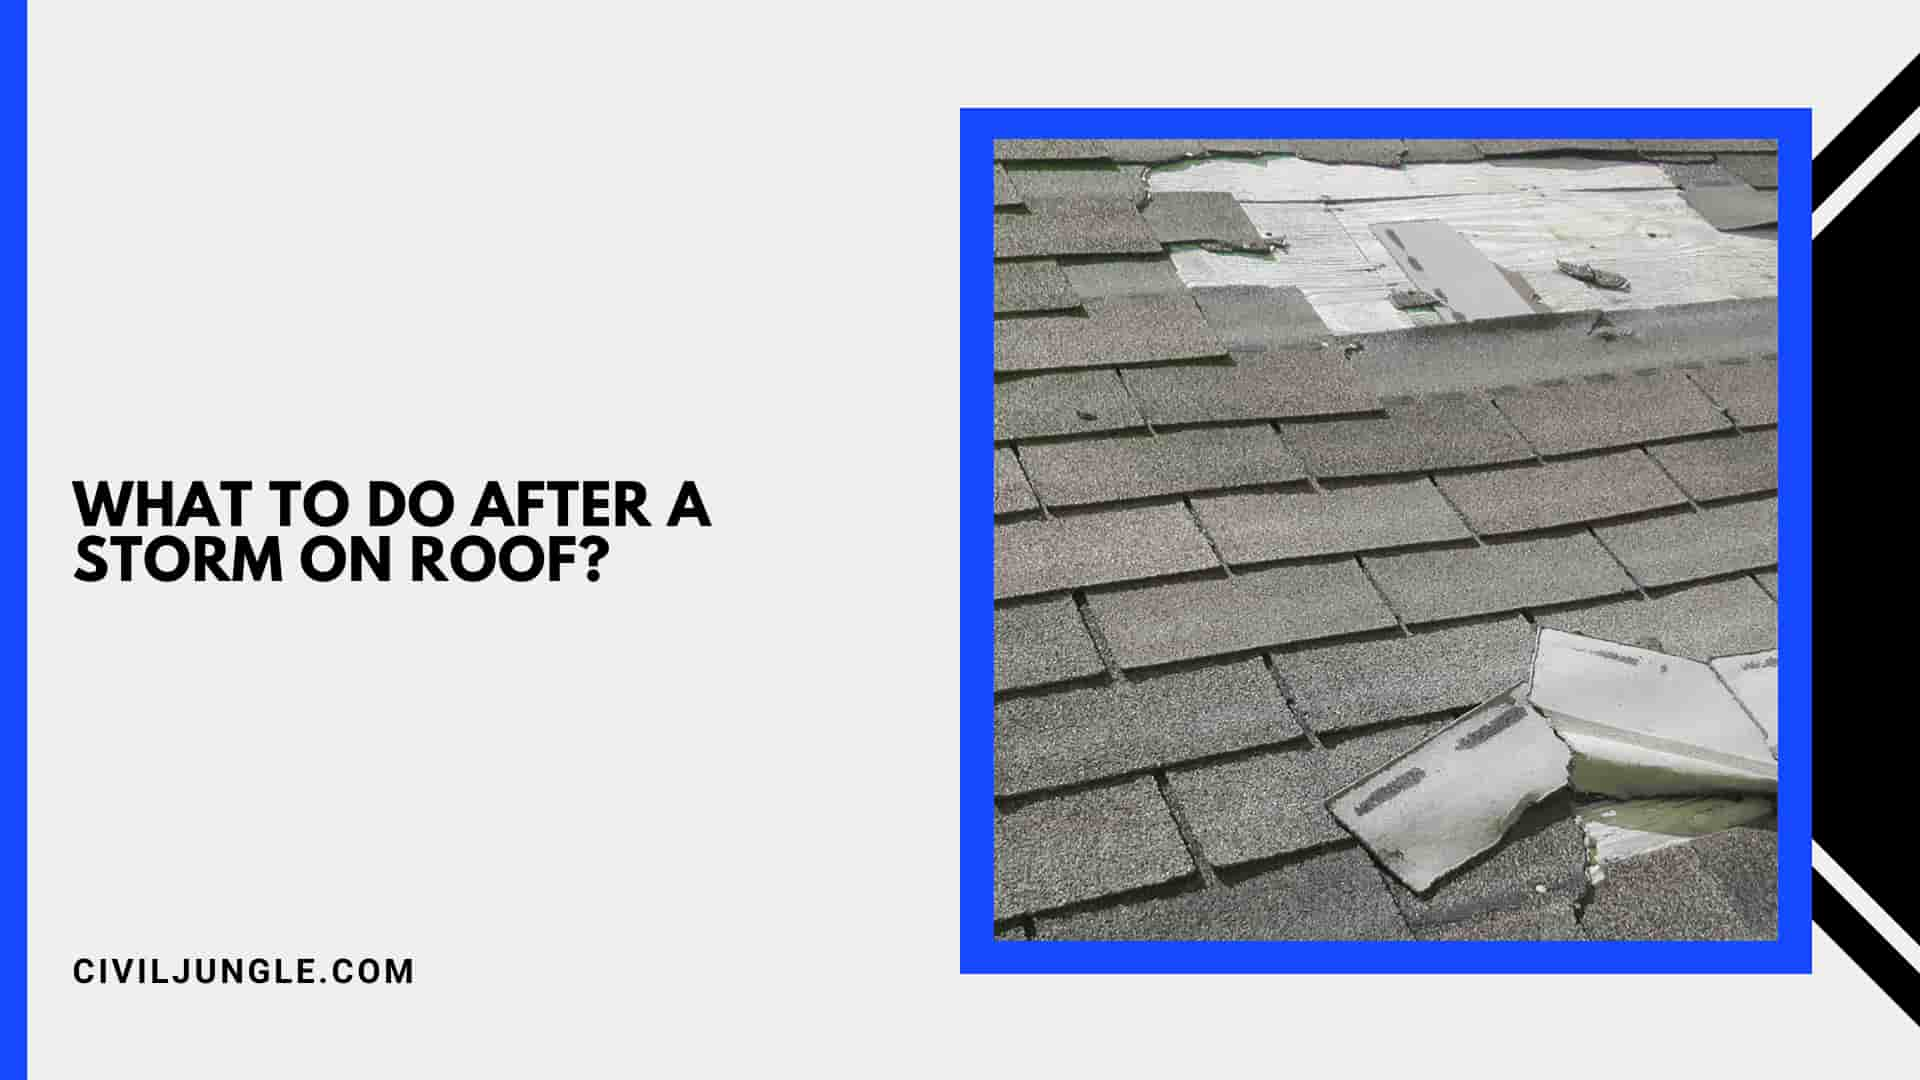
After passing the storm, we need to determine the number of damages, so here are some steps.
- Start with the Protruding Roof Parts: First, we check the damaged parts of the skylights, chimneys, and other protruding roof parts. Those parts must be sealed properly to avoid water leaks. Then we need necessary actions for those damages.
- Inspect the Exterior Shingles: Due to storms, the roofs of the houses are damaged widely because they protect you as a front-line defense against tough outdoor weather conditions. Then we check curling, granular loss, cracked shingles, missing shingles, etc. We need to hire a roofing contractor for inspection purposes or use a binocular.
- Examine the Roof Vents: Sometimes, the roof’s soffit and fascia are also damaged and vents are also damaged or warped, then outdoor air comes inside.
- Inspect the Gutters: Generally, the gutters divert the rainwater away from the house. Sometimes, the gutters get clogged, and then water backs up under the singles and starts leaking. Gutters are clogged due to the hip of twigs, leaves, and other debris on the roof shingles.
- Check the Attic and Ceilings: If the damage has happened in the outside portion of the roof, then you need to check the attic and ceiling for signs of water spots. Wind and hail are the main causes of invisible leaks, which is very disturbing; you need to check those by using a flashlight.
Types of Roof Storm Damage
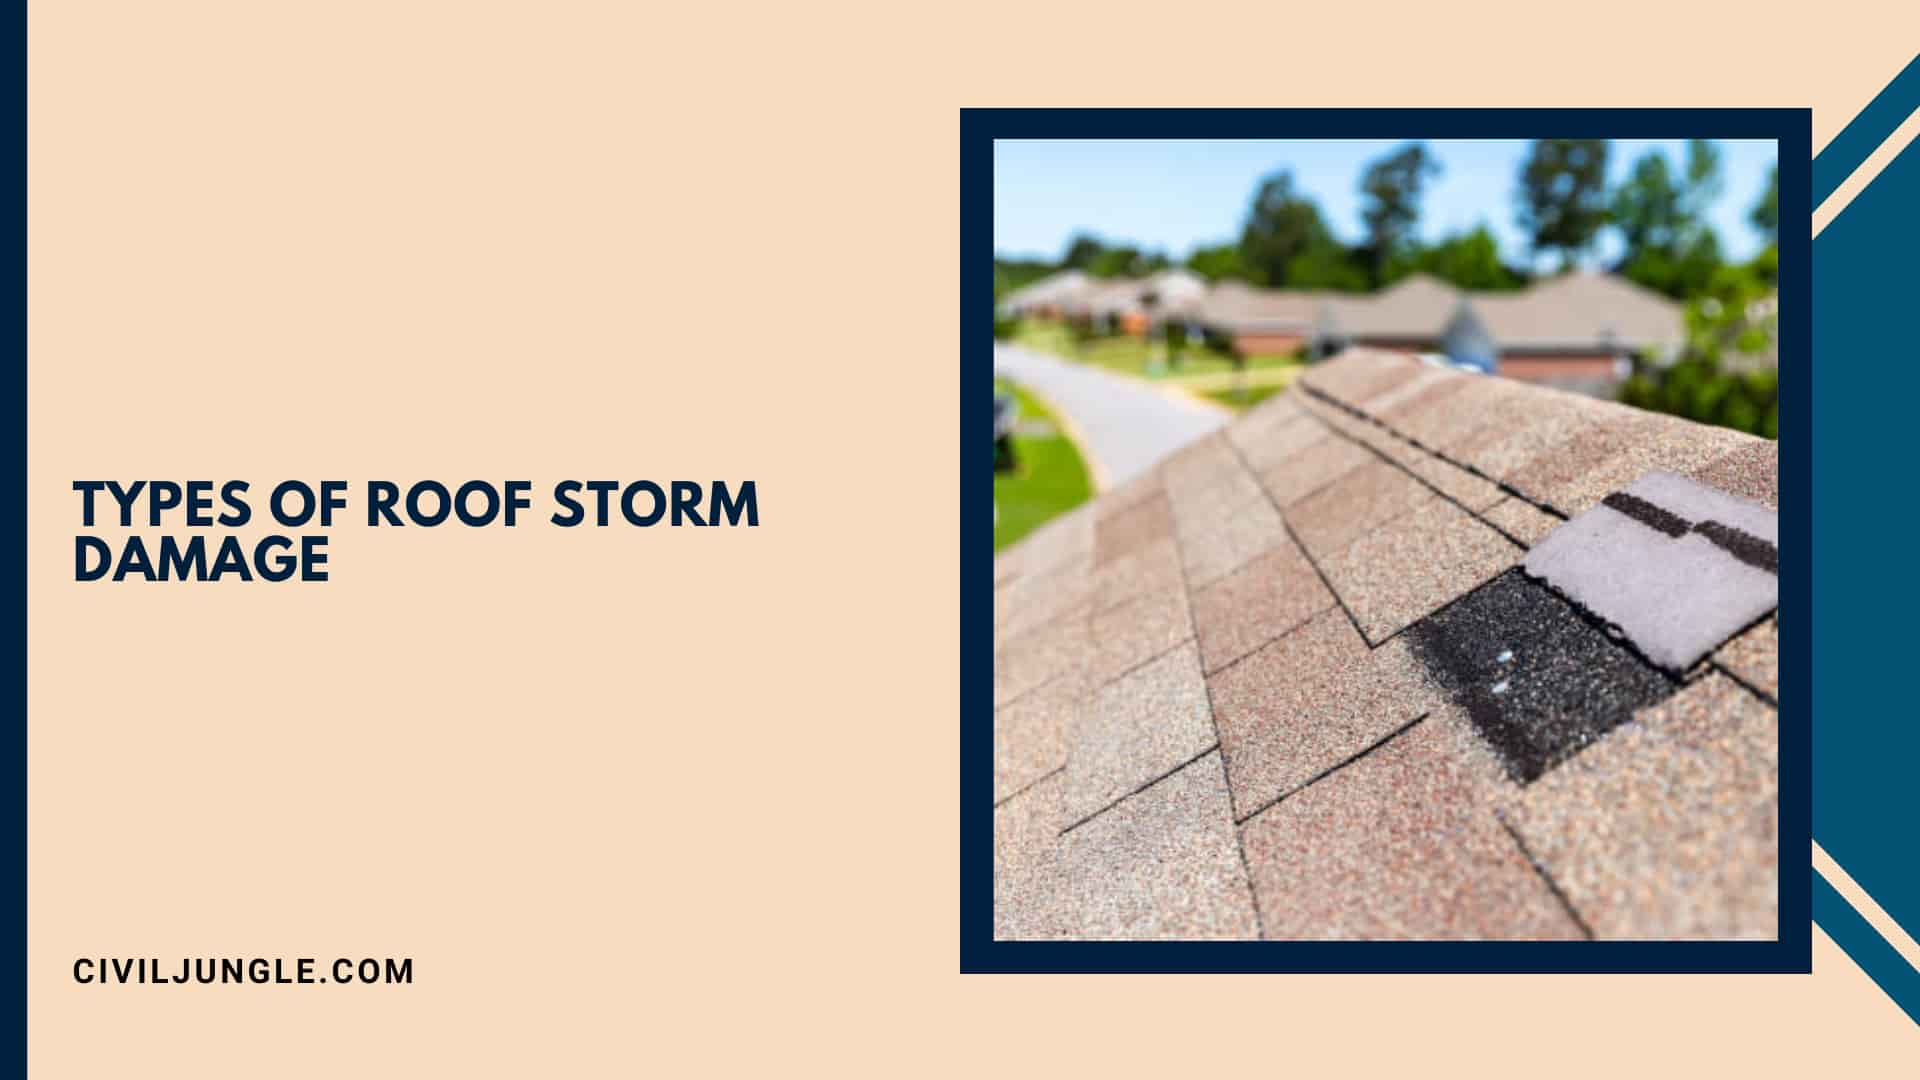
Understanding the types of roof damage is crucial, as different storms cause various damages, each requiring a unique approach to repair and prevention. There are many types of roof storm damage are there,
1. Wind
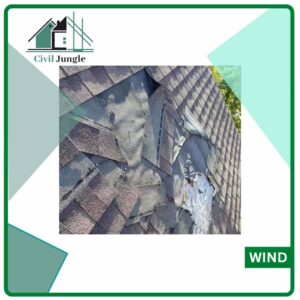
Wind damage is a common concern, and this section can be considered a part of your storm damage roof inspection. Storms like hurricanes which have high wind forces can cause severe damage to your roof.
This type of storm wind can tear or remove roof shingles; so, the roof deck is exposed. Gale winds are slower than hurricane winds and can also cause damage to your roof; they can also curl or lift up the roof shingles.
2. Hail
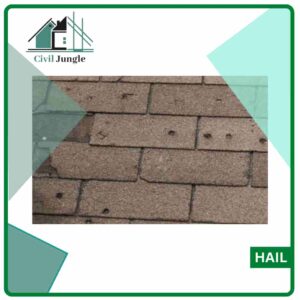
Hail is that type of storm that stands not more than a quarter of an hour. At this time, it can cause pockmarks and visible dents in the roof. It also loses the roof shingles, which requires immediate roof repair work.
3. Standing Water
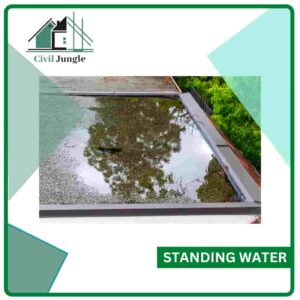
If your roof has not had a proper drainage system, then you must face the issue of standing water problem. You need to take the necessary actions. Sometimes, clogged gutters are the main cause of standing water. Here, moisture seeps into the roof deck and creates huge problems.
4. Debris
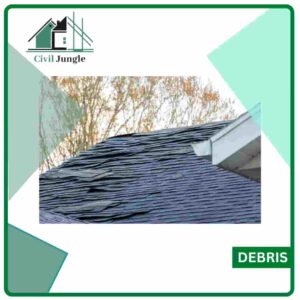
Due to the heavy storm, debris is hurled onto the roof, and tree branches can create a huge impact on your roof surface. This can cause moisture seeping damage into your roof parts.
Roof Storm Damage Checklist
Following a storm damage inspection, it’s imperative to schedule and conduct a thorough roof inspection to assess the extent of the damage. A roof is replaced after thirty years; in the real world, there are so many things that can damage your roof, and repair, or inspection work is needed.
In America, there is a huge problem due to storms where roof repair work is required. In your country, if there is no massive issue with the storm.
It damages the roof parts, and it is very dangerous for that house owner also; so, you can also follow those steps. So, a roof storm damage checklist is the necessary and required action to protect or repair the roofs.
1. Schedule and Conduct a Roof Inspection
Here, we should contact a professional, trusted roofing contractor for inspection of the roof. There are some parameters that a contractor needs to check-
- Roof: At first, the contractor needs to check those damages by walking around the house and taking the required notes. Then you keep the notes and take pictures of that roof damages portion. Visible damages like torn, dented, curled, missing shingles, etc., are noted down for the work.
- Gutters, Vents, and Windows: Then we check the home gutters, roofing accessories, etc., like overhang portion, and gable vents. In windows, we inspect the cracks, loose weather stripping, broken glass, torn screens, etc.
- Outside Areas: After that, the contractor walks around your house to look after fallen trees, posts, damaged lawn furniture, etc., and check flat surfaces like decks, and patios for hail damage.
- Attic and Ceiling: A good professional should inspect and observe the leakage and water spot areas. These leaks can create huge problems in later times. Special attention should be taken to light fixtures, and ceiling water leaks, and flashlights should be used in the dark areas of your roof.
2. Hire a Dependable, Trusted Roofing Contractor
- A dependable contractor can also guide you through the storm damage roof replacement inspection process if a replacement is deemed necessary.
- It’s very necessary to work with a trustable contractor.
- Sometimes roof repair companies offer you a big discount and deals but make sure that the repair qualities are the same as always.
- Generally, roofing contractors can easily assess the damages with professional experience eyes.
- They provide an estimated cost for repair purposes and then start repair or replacement works.
3. Talking to a Trusted Roofing Contractor
- Please contact a licensed, insured contractor who can also provide a warranty for that project after finished.
- Make sure that the roofing contractor is capable of assessing and estimating damage.
- The main thing is you need to check out the contractor’s profile and online reviews and the experience of other people.
Roof Checklist
A roof inspection is when a roofing contractor checks the condition of your entire roof. They’ll check your roof penetrations, your attic’s ventilation, and more.
New Roof Checklist
Here, the roof checklist are as follows, also the Roofing Inspection Checklist PDF file please check.
- General Information
- Name & Adress
- Status of Roof Owner [Applicant, Already Insured, Other (Specify)]
- Name of Application
- Application Number
- Insured Info
- Name of Insured
- Policy Number
- Predominant Roof
- Roof Geometry
- Flat Roof
- Hip Roof
- Mansard Roof
- Tented Roof
- Dutch Gable Roof
- Pavillion Roof
- Helm Roof
- Other
- Covering Materials
- Wood Shingles
- Asphalt Shingles
- Clay Shingles
- Tin
- Tile
- Other
- Roof Age
- Reaming Useful Life
- Date of Last Roofing Permit
- Date Update
- Overall Condition of Roof
- Excellent
- Good
- Fair
- Poor
- Other
- Visible Damage
- Curling
- Lifted
- Loose shingles
- Missing shingles
- Sagging
- Uneven
- Leaks
- Other
- Roof Geometry
- Secondary Roof
- Roof Geometry
- Flat Roof
- Hip Roof
- Mansard Roof
- Tented Roof
- Dutch Gable Roof
- Pavillion Roof
- Helm Roof
- Other
- Covering Materials
- Wood Shingles
- Asphalt Shingles
- Clay Shingles
- Tin
- Tile
- Other
- Roof Age
- Reaming Useful Life
- Date of Last Roofing Permit
- Date Update
- Overall Condition of Roof
- Excellent
- Good
- Fair
- Poor
- Other
- Visible Damage
- Curling
- Lifted
- Loose shingles
- Missing shingles
- Sagging
- Uneven
- Leaks
- Other
- Roof Geometry
- Certification
- Meets Standard
- Yes
- No
- Name of Inspector
- Inspector Phone Number
- Lince Type
- Lince Number
- Signature
- Date
- Time
- Meets Standard
New Roof Inspection Checklist PDF: Click Here (Sorce: fulcrumapp.com)
Roof Estimate Checklist
Below are all the points used for a simple precaution of the roofing estimate checklist. With the help of these points, we can easily calculate the Roof estimate checklist.
- Company Contact Info
- Full Work Description
- Start and Completion Date
- Materials to Be Used
- Total Cost
- Tearing Off the Old Roof
- New Shingle Installation
- Underlayment
- Flashing, Kick-Out Flashing, Counter Flashing
- Lead Pipe Jacks
- Chimney Work
- Ice and Water Barrier
- Ridge or Box Vents
- Flapper Vents
- Gutters
- Cleanup and Dump Fees
- Permits
- Labor
- Warranties
Roof Replacement Checklist
This checklist for roof replacement is a valuable resource for homeowners looking to replace their roofs due to storm damage or other reasons.
Below are all the points used for a simple precaution of the Roofing Replacement Checklist. With the help of these points, we can easily calculate the Roof replacement checklist.
| Copies Rqd | ADMINISTRATION CHECKLIST To be completed by Customer Service Centre |
Complete ✓ |
|||||
| 2 | Geyserview printout (contour plan) checked with Applicant for Correctness | ||||||
| 1 | Green PIM/BC Master cover has been completed | ||||||
| 1 | Site Inspection Card completed | ||||||
| 1 | Applicant Inspection card complete | ||||||
| 1 | Form 6 (Application for Code Compliance Certificate) attached to Applicant Inspection Card | ||||||
| Form 2 administratively complete and front cover signed appropriately | |||||||
| Lodgment category cost for building consent is 4A with an additional inspection of ½ hour | |||||||
| Applicant S = Supplied N/A= Not Applicable Please arrange an vetting appointment through customer services should you wish to lodge this application in person (2 copies of plans and any relevant specifications to be supplied with the application) |
|||||||
| Building Consent No. | Processor Name: | ||||||
| Form 2 | Building Consent Application Form completed and signed | S | N/A | P | F | N/A | |
| Roofing is defined as “restricted building work”. The design must be completed out by a Licensed Designer? |
Y | N | P | F | N/A | ||
| As this project is defined as “restricted building work” a Form 2A (Certificate of Design Work) must be provided. |
Y | N | P | F | N/A | ||
| Have all Licensed Building Practitioner’s been identified? | Y | N | P | F | N/A | ||
| Site Plan | House plans or Geyser View plan can be used to meet this requirement, request representative from Customer Services to print 2 copies. (indicate area of re-roof on this plan) Owner / Address match Form 2? |
S | N/A | P | F | N/A | |
| 1 | Detail what type of roofing material exists | S | N/A | P | F | N/A | |
| 2 | Details of the new of roofing material that is to be used
|
S | N/A | P | F | N/A | |
| 3 | Roof pitch | S | N/A | P | F | N/A | |
| 4 | Provide details of any new framing members
|
S | N/A | P | F | N/A | |
| 5 | Provide flashing details that meet the roofing manufacturers requirements
|
S | N/A | P | F | N/A | |
| 6 | Wind fixings
(change of roofing product may result in the need to upgrade up lift fixings specifically where a heavy weight roof is replaced by a light weight product) Please circle appropriate site-specific wind loading: Low Medium High Very High Specific Engineer Design |
S | N/A | P | F | N/A | |
| 7 | Bracing to meet NZS 3604 / NZS 1170 D (change of roofing product may result in the need to increase existing bracing)Detail both existing braces and the proposed (where the bracing is unknown provide new bracing to comply with the relevant building standard)Space, Plane, hip and valley or Gable end wall |
S | N/A | P | F | N/A | |
| 8 | Penetrations through roofing material
|
S | N/A | P | F | N/A | |
| 9 | Gutters (are there to be any change to existing gutters or downpipes that are not a direct replacement? Moving location or number of downpipes?)
|
S | N/A | P | F | N/A | |
| 10 | Ventilation to roof/ceiling space (Membrane, enclosed or skillion roofs) | S | N/A | P | F | N/A | |
| 11 | Any fire rating issues that need to be addressed e.g. eaves closer than 650mm to boundary clear light roofing no closer that 1.0m to boundary etc. | S | N/A | P | F | N/A | |
| 12 | Domestic smoke alarm(s) detailed on floor plan (Refer to NZBC F7 for requirements within 3m of sleeping areas and on escape route of each level) | S | N/A | P | F | N/A | |
| Additional Fees | |||||||
| Please be aware that additional fees may be applied after the lodgment deposit is paid, for inspections, processing, certificates, government levies and the like (discussed?). | Y | N | |||||
| RDC use only P = PassF = Non-compliance with the Building Code – further information required N/A= Not Applicable RDC staff to record reasons for decisions in the question text box |
|||||||
| Other considerations (waivers and modifications- alternative solutions, TL authors- – section 75, fire rating etc) | |||||||
| GRANTING BUILDING CONSENT | |||||||
| Sign the application form to grant the building consent once satisfied on reasonable grounds that if the building work was to be constructed in accordance with the approved documents, then compliance with the Building Code will be met. | |||||||
| Ref: CPV07 V06 Issued: 21/12/2012 | |||||||
Roof Replacement Checklist PDF: Click Here (Source: yumpu.com)
Hail Damage Inspection Checklist
Below are all the points used for a simple precaution of the shingle roof inspection checklist. With the help of these points, we can easily calculate the hail damage inspection checklist.
- Things to Be Inspected
- Individual tiles, shakes, shingles: Any dents, pockmarks, bruising, splits, cracks, splintering mineral loss?
- Overall appearance: E.g. the shininess of asphalt roofing
- Roof vents
- Siding
- The interior ceiling is there any water damage?
- During Your Inspection
- Document any damage with photographs
- Write down any pertinent details of the storm
- Include the date, time & damage details
- Call your insurance company immediately
- Arrange an assessment with your insurance company
Hail Damage Inspection Checklist PDF: Click Here (Source: Civiljungle.com)
Flat Roof Inspection Checklist
Here, the flat Roof Maintenance Checklist are as follows.
| 1. General Roof Conditions | |
| Item | Remarks |
| Dean on Roof | |
| Drainage | |
| Physical Damage | |
| Attic Conditions | |
| Structural Deformation | |
| Other | |
| 2. Flat / Membrane Roof | |
| Item | Remarks |
| Condition of Coating | |
| Granular Loss | |
| Punctures | |
| Cracks/Alligatoring | |
| Blisters/Fistmouths | |
| Ponding | |
| Other | |
| 3. Roof Features | |
| Item | Remarks |
| Fascia | |
| Soffit | |
| Flashing | |
| Gutters/Drains, etc. | |
| Skylights | |
| ChimneysNents | |
| Fall Arrest Anchors | |
| Control Zone Access | |
| Other | |
| 4. Exterior Wall Surfaces | |
| Item | Remarks |
| Deformed Finish | |
| Surface Deterioration | |
| Staining | |
| Other | |
| 5. Interior Wall Surfaces | |
| Item | Remarks |
| Cracks | |
| Water Staining | |
| Water Leaks | |
| Deformed Finish | |
| Seasonal Change | |
| Window Leaks | |
| Door/Window Alignment | |
| Other | |
| 6. Ceiling Conditions | |
| Item | Remarks |
| Cracks | |
| Water Staining | |
| Water Leaks | |
| Seasonal Change | |
| Other | |
Flat Roof Inspection Checklist PDF: Click Here (Source: Civiljungle.com)
TPO Roof Inspection Checklist
| 1. Structure complies to the New Zealand Building Code and concrete complies with NZS 3101 (2006) | ||||||||
| 2. Concrete cured with curing membranes removed. Concrete substrate contains less than 5% moisture content. | ||||||||
| 3. Surface smooth and clean with falls as per plan. | ||||||||
| 4. Cavities and cracks filled, flushed off and cured. | ||||||||
| 5. Concrete surface firm with any soft concrete or laitance removed. | ||||||||
| 6. Ponding areas removed. | ||||||||
| 7. Roof drains and overflow recesses formed to fit rebated outlets. | ||||||||
| 8. If terminating into a chase, pre-form the chase, straight and 20mm deep. | ||||||||
| 9. Plinths formed for any exterior ventilation, solar panels or fixtures. | ||||||||
| 10. Construction joints incorporated in slab as per designers specification. | ||||||||
| 11. Substrate clean, firm and suitable condition for laying GAF Everguard TPO. |
TPO Roof Inspection Checklist PDF: Click Here (Source: Civiljungle.com)
Roof Maintenance Checklist
Below are all the points used for a simple precaution of the Roof maintenance checklist. With the help of these points, we can easily maintenance the roof checklist.
- Roof Condition
- General
- Debris
- Walkways
- Substrate
- Contaminants
- Leaks
- Drainage
- Roof Drains
- Scuppers
- Gutters
- Downspouts
- Ponding
- Coating
- Bare Spots
- Blisters
- Adhesion
- Cracks
- Pinholes
- Mechanical Damage
- General
- Membrane
- Blisters
- Cracks
- Mechanical Damage
- Bird Damage
- Storm Damage
- Soft & Spongy
- Wet
- Flashing
- Base Flashing
- Counter Flashing
- Coping
- Gravel Stop/facia
- Penetration
- Pipes
- A/c Units
- Vents Skylights
- Expansion Joints
- Ducts
- Walls
Roof Maintenance Checklist PDF: Click Here (Source: PMsilicone.com)
Metal Roof Inspection Checklist
Checklists used during the installation most often check and track activities, progress, and communication items. Each log should include the date and names or initials of key people.
This includes not only the person completing the checklist, but also the person(s) performing specific tasks, such as sealing, gutter cleaning, or other trades performing work on the roof. Examples of detailed items a daily checklist may include are:
- Install underlayment
- Squares installed = _______
- Remove protective film from installed panels
- Check and clean gutters
- Notify electrician
- Notify/schedule HVAC reconnect
- Cover and secure stage material
- Store ladders and lock gate
- Photos
- Clean-up
When such checklists are completed on a regular, or even a daily basis, then filed, a comprehensive record of the installation is created without any additional effort.
A useful, but often overlooked, item to include on a daily log is the addition of a section for random notes of significance. Such notes would include key factors like weather and Jobsite conditions, delays, or injuries, of any nature.
Metal Roof Inspection Checklist PDF: Click Here ( Source: metalconstruction.org)
Roof Preventative Maintenance Checklist
Below are all the points used for a simple precaution of the roof preventative maintenance checklist.
- Cleaning of light organic and inorganic debris from the roof, drains and scuppers as needed.
- Maintenance level repairs to parapet wall flashings as needed (re-secure metal, caulk holes, seal laps, etc.).
- Maintenance level repairs to parapet wall flashing laps and seams as needed (seal open laps or seams with mastic or flashing tape).
- Maintenance level repairs to the exposed masonry parapet wall as needed (temporary caulk open joints or holes; apply small temporary patches as required).
- Temporary maintenance level repairs to the exposed masonry chimney penetrations as needed (temporary caulk open joints or holes; apply small temporary patches as required).
- Maintenance level repairs to rooftop unit flashings as needed (seal open laps or seams with mastic or flashing tape).
- Maintenance level repairs to the roof membrane as needed (seal or tape open seams and laps; minor repair of open splits or blisters; general and limited repairs to membrane conditions currently causing interior water leaks).
- Maintenance level repairs to the roof membrane’s laps and seams as needed (seal open laps or seams with mastic or flashing tape).
- Reset & re-attach existing walk pads as needed.
- Reset existing metal soffit panels as needed and as accessible.
- Maintenance level repairs to pipe flashings as needed.
- Maintenance level repairs to pipe support as needed.
- Maintenance level repairs to metal edging as needed (re-secure loose metal and/or seal open laps).
- Maintenance level repairs to the metal coping as needed (re-secure loose metal and/or seal open laps).
- Maintenance level repairs to metal fascia as needed (re-secure loose metal and/or seal open laps).
- Maintenance level repairs to expansion joints as needed (seal open joints or holes in expansion joint material).
- Maintenance level repairs to area divider/control joints as needed (seal open joints, seams or holes).
- Maintenance level repairs to roof drain, overflow drains, gutters, downspouts, scuppers, and collector heads as needed (caulk or seal open-drain flashings or open metal connection joints as possible).
- Maintenance level repairs to skylights as needed (seal open metal joints or holes).
- Maintenance level repairs to pitch pockets/pourable sealer pockets as needed (top off-pitch pans to allow for watershed).
- Re-fastening of loose metal termination bar as needed (tighten fasteners or replace missing fasteners and touch up open caulking).
- Re-fastening of metal counter flashing as needed (tighten fasteners or replace missing fasteners and touch up open caulking).
- Maintenance level repairs to metal roof areas as needed (tighten loose end-joint fasteners or replace missing fasteners; seal open laps, seams and holes).
- Temporary maintenance level repairs to exposed metal ductwork as needed (temporary duct joint sealing to stop active leaking).
- Temporary maintenance level repairs to roof-related EIFS walls as needed (reseal open EIFS and/or touch up open caulking).
- Redistribute ballast as needed (limited scale and quantity, maintenance level).
- Trim back foliage as needed and possible from roof level. Small tree branches or limited vegetation overgrowth onto a roof that can be removed at a maintenance
- Temporarily repair shingle roof areas that can be safely accessed (re-secure shingles, and/or seal open valleys or flashings).
- Perform an under-deck visual inspection as needed.
- Record and catalog Maintenance Inspection Forms required to sustain the Manufacturers warranty.
- All maintenance level work shall be completed in accordance with OSHA stan
Roof Preventative Maintenance Checklist PDF: Click Here (Source: technicalassurance.com)
Commercial Roof Inspection Checklist
Below are all the points used for a simple precaution of the commercial roof maintenance checklist.
- Interior
- Roof Deck
- Corrosion
- Spalling
- Cracking
- Buckling
- Sagging
- Open Joints
- Overall Deck Condition
- Bitumen Drips
- Other:
- Walls
- Movement
- Setting
- Cracks
- Spalling (Chipping or crumbing)
- Paint Peeling
- Water Strains
- Other:
- Roof Deck
- Exterior
- Walls
- Deteriorated Mortar Joints
- Settlement Cracks
- Stains
- Efflorescence
- Windows
- Fascia Displaced
- Gutter Anchors
- Downspouts
- Gutter General Condition
- Other:
- Walls
- Metal Flashings
- Counter Flashing
- Loose/Missing Fasteners
- Loose/Displaced Metal
- Deformed Metal
- Corrosion
- Loose/Missing Joint Cover
- Check Sealant
- Punctures
- Cracked/Broken Coping Cap
- Open Coping Joint
- Other:
- Coping / Cap Finishing
- Loose/Missing Fasteners
- Loose/Displaced Metal
- Deformed Metal
- Corrosion
- Loose/Missing Joint Cover
- Sealant Joints
- Punctures
- Other:
- Expansion Joints
- Loose/Missing Fasteners
- Loose/Displaced Metal
- Deformed Metal
- Loose/Missing Joint Cover
- Sealant Joints
- Stripped-in Flashing
- Punctures
- Splitting
- Mechanical Damage
- Hinders Drainage
- Other:
- Edge Metal
- Loose/Missing Fasteners
- Loose/Displaced Metal
- Splits in Stripped-in Flashing Joints
- Corrosion
- Loose/Missing Metal Sections
- Loose/Missing Joint Cover
- Open End Joints
- Sealant Joints
- Other:
- Base Flashing
- Exposed Top Seal
- Adhesion
- Seams/Attachment to Field
- Vertical Laps
- Deterioration
- Punctures
- Sagging/Wrinkling
- Excessive Bridging
- Other:
- Counter Flashing
- Penetrations
- General
- Pitch Pocket Sealant
- Loose Flashing
- Drawbands
- Other:
- Drains
- Strainers/Clamping Ring
- Clear of Debris
- Flashing
- Overall Cleanliness
- Other:
- Rooftop Equipment
- Attachment to Curbs
- Access Panels
- Housing
- Liquid Discharge
- Condensation
- Roof Adjacent to Equipment
- Other:
- Conduit or Pipe
- Sagging
- Supports Moving
- Joints
- Corrosion
- Other:
- General
- Membrane/Shingle
- General
- Discoloration
- Coating/Surfacing
- Cracking
- Wrinkles
- Punctures
- Walkways, Displaced
- Walkways, Deteriorated
- Walkways, Needed
- Delamination
- Alligatoring
- Granule Adhesion
- Standing Water
- Vandalism
- Foot Traffic Damage
- Blistering
- Buckling
- Mechanical Damage
- Exposed Felt/Deck
- Hail Damage
- Other:
- Lips
- Open Joints
- Fishmouths
- Other:
- Membrane
- Unadhered Areas
- Blisters
- Loose Insulation
- Fasteners Backing Out
- Ridges
- Other:
- Miscellaneous
- Antennas
- Guy Wises
- Ice or Icicles
- Oil Deposits
- Surface Contamination
- Soft Areas
- Vandalism
- Vegetative Growth
- Other:
- General
- Coating
- General
- Reflectivity (Rating)
- Discoloration
- Adhesion
- Cracking/Peeling
- Crazing
- Other:
- General
- Surfacing
- General
- Type:
- Coverage/Bare spots
- Discoloration
- Gravel Stop
- Other:
- Photographic Record
- Film/Digital Photography
- Video
- Other:
- General
*Mark all items with the appropriate code on the roof plan grid. Keep copies of inspection forms and photographic or other evidence with the Roof Historical Record.
Commercial Roof Inspection Checklist PDF: Click Here (Source: mrca.org)
Residential Roof Inspection Checklist
Below are all the points used for a simple precaution of the residetial roof maintenance checklist.
- Interior
- Roof Deck
- Corrosion
- Spalling (chipping or crumbling)
- Cracking
- Buckling
- Sagging
- Open Joints
- Overall Deck Condition
- Stains/Drips
- Other:
- Walls
- Movement
- Setting
- Cracks
- Spalling (Chipping or crumbing)
- Paint Peeling
- Water Strains
- Other:
- Roof Deck
- Exterior
- Walls
- Deteriorated Mortar Joints
- Settlement Cracks
- Stains
- Efflorescence
- Windows
- Fascia Displaced
- Walls
- Metal Flashings
- Counter Flashing
- Loose/Missing Fasteners
- Loose/Displaced Metal
- Deformed Metal
- Corrosion
- Sealant Joints
- Punctures
- Other:
- Drains/Downspouts
- Strainers/Clamping Ring
- Clear of Debris
- Flashing
- Overall Cleanliness
- Gutter Anchors
- Drains/Downspouts
- Gutter General Condition
- Other:
- Counter Flashing
- Penetrations
- General
- Pitch Pocket Sealant
- Loose Flashing
- Drawbands
- Other:
- Conduit or Pipe
- Sagging
- Supports Moving
- Joints
- Corrosion
- Other:
- General
- Membrane/Shingle
- General
- Discoloration
- Coating/Surfacing
- Cracking
- Wrinkles
- Punctures
- Delamination
- Alligatoring
- Granule Adhesion
- Standing Water
- Vandalism
- Foot Traffic Damage
- Mechanical Damage
- Exposed Felt/Deck
- Hail Damage
- Other:
- Miscellaneous
- Antennas
- Guy Wises
- Ice or Icicles
- Oil Deposits
- Surface Contamination
- Soft Areas
- Vandalism
- Vegetative Growth
- Other:
- Photographic Record
- Film/Digital Photography
- Video
- Other:
- General
*Mark all items with the appropriate code on the roof plan grid. Keep copies of inspection forms and photographic or other evidence with the Roof Historical Record.
Residential Roof Inspection Checklist PDF : Click Here (Source: mrca.org)
Frequently Asked Questions
What Should I Do Immediately After a Storm to Check for Roof Damage?
After a storm, conduct a visual inspection of your roof from the ground. Look for missing or damaged shingles, debris, and any signs of water leaks inside your home. If it’s safe, you can use a ladder for a closer look, but be cautious.
How Can I Identify Hidden Roof Damage That Isn’t Immediately Visible?
Hidden damage may include small leaks, structural damage, or issues with your roof’s underlayment. Check your attic for signs of water intrusion, such as wet insulation or water stains. A professional roof inspection is recommended for thorough assessment.
Can I Inspect and Repair Roof Damage Myself?
While minor repairs can be DIY projects, it’s best to hire a professional roofing contractor for a comprehensive inspection and repair, especially for significant or hard-to-reach damage. Professionals have the expertise and tools to safely and effectively address storm damage.
How Do I Choose a Reputable Roofing Contractor for Storm Damage Repairs?
Look for licensed and insured contractors with good reviews and references. Verify their credentials and ask for a detailed written estimate. Avoid contractors who demand full payment upfront or lack proper documentation.
What Is the Role of My Homeowner’s Insurance in Covering Storm Damage Repairs?
Most homeowner’s insurance policies cover storm damage repairs. Review your policy to understand coverage details and deductibles. Document all damage with photos and keep receipts for repairs to support your insurance claim.
How Long Do I Have to File an Insurance Claim for Roof Storm Damage?
The timeframe for filing a claim varies by insurance policy and provider. Typically, you should file a claim as soon as possible after discovering the damage. Contact your insurance company for specific deadlines and procedures.
What Temporary Measures Can I Take to Prevent Further Damage Before Repairs Are Made?
Use tarps or plastic sheeting to cover damaged areas and prevent water intrusion. Remove any loose debris from the roof and gutters. These temporary fixes can help protect your home until professional repairs are completed.
How Often Should I Have My Roof Inspected, Especially in Storm-Prone Areas?
It’s recommended to have your roof inspected at least once a year, and after any major storm. Regular inspections can help identify potential issues early and maintain the integrity of your roof.
What Are Common Signs of Roof Damage to Look Out for After a Storm?
Common signs include missing or broken shingles, dented metal components, granule loss from shingles, leaks or water stains inside your home, and visible debris on the roof.
Are There Specific Roofing Materials That Are More Resistant to Storm Damage?
Yes, materials like impact-resistant shingles, metal roofing, and rubberized asphalt can offer better protection against hail, wind, and debris. Consult with a roofing professional to choose the best materials for your area.